Introduction
Lets Get Started
Pre-Requisites:
Before getting started, we need to know what is MVC. As we would be dealing everything with MVC components.
![]()
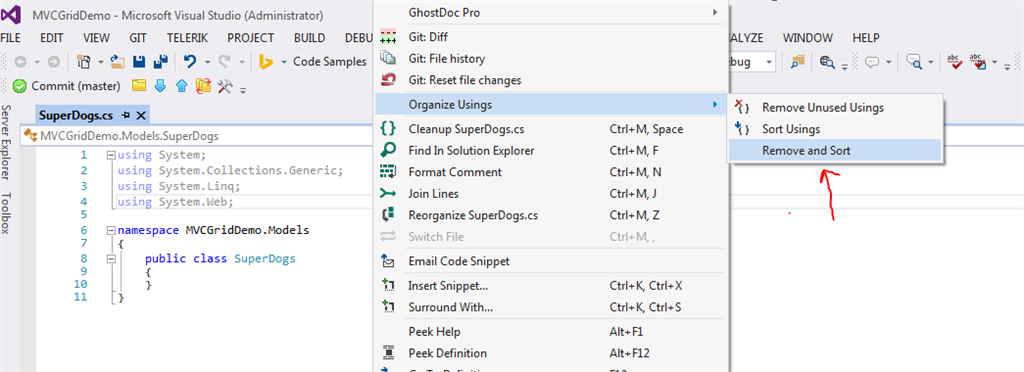
In the above image as you can see, I have red arrowed towards an option called Remove & Sort. What this does is, when we add a class the using statements are added automatically even if they are not being used. So to maintain the consistency lets remove them. And we can remove them by right clicking on the class file and click on the above nested route i.e. Remove & Sort and finally our class SuperDog.cs would look like:-
-
12345678910namespace MVCGridDemo.Models{public class SuperDogs{public string DogName { get; set; }public string BreedName { get; set; }public int DogAge { get; set; }public string DogOwner { get; set; }}}
This is the class we have added after removing or sorting the Usings statements. 🙂
Step 4:
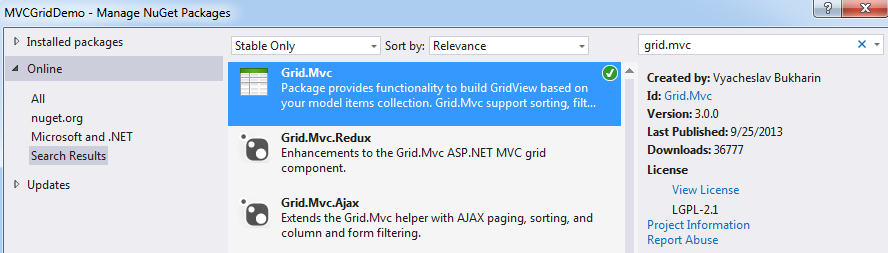
We should also search for the Bootstrap online and istall that too.
Step 5:
-
123456789101112131415161718192021222324252627282930313233343536373839404142434445464748495051525354555657585960616263/// <summary>/// This returns the hard code values required for setting the grid/// </summary>/// <returns></returns>public List<SuperDogs> GetHardCodedValues(){var returnModel = new List<SuperDogs>();var firstDog = new SuperDogs{BreedName = "Labrador",DogAge = 1,DogName = "HACHIKO",DogOwner = "SURAJ SAHOO",};var secondDog = new SuperDogs{BreedName = "Labrador",DogAge = 2,DogName = "STEFFY",DogOwner = "XYZ",};var thirdDog = new SuperDogs{BreedName = "Golden Retriever",DogAge = 3,DogName = "LOVELY",DogOwner = "PQrS",};var forthDog = new SuperDogs{BreedName = "German Spitz",DogAge = 5,DogName = "CANDY",DogOwner = "ABCD",};var fifthDog = new SuperDogs{BreedName = "German Sheperd",DogAge = 10,DogName = "CAPTAIN",DogOwner = "Mota",};var sixthDog = new SuperDogs{BreedName = "British BullDog",DogAge = 10,DogName = "BILL",DogOwner = "AUTA",};for (var i = 0; i < 10; i++){returnModel.Add(firstDog);returnModel.Add(secondDog);returnModel.Add(thirdDog);returnModel.Add(forthDog);returnModel.Add(fifthDog);returnModel.Add(sixthDog);}return returnModel;}
The above piece of code is added inside the model class SuperDog.cs only.
Step 6:
Now lets discuss the codes inside the Action method.
The first line is the instantiation of the model class which we have added. This we are instantiating as we need to access the collection of data objects which we have created inside method GetHardCodedvalues().
- @model IEnumerable<MVCGridDemo.Models.SuperDogs>
This is the model used in the view.
Now its time to add the Grid code block into our view. The MVC Grid is used using
Finally the view with the html mvc Grid looks like below:
-
12345678910111213141516171819202122232425262728@using GridMvc.Html@model IEnumerable<MVCGridDemo.Models.SuperDogs>@{ViewBag.Title = "Index";}<html><head><meta name="viewport" content="width=device-width" /><link href="@Url.Content("~/Content/Gridmvc.css")" rel="stylesheet" /><link href="@Url.Content("~/Content/bootstrap.min.css")" rel="stylesheet" /><script src="@Url.Content("~/Scripts/gridmvc.min.js")"></script><title>Dog List</title></head><body><h1>Dog List</h1><hr /><div style="width:500px;">@Html.Grid(Model).Columns(columns =>{columns.Add(c => c.DogName).Titled("Dog Name");columns.Add(c => c.BreedName).Titled("Breed").Filterable(true);columns.Add(c => c.DogAge).Titled("Age");columns.Add(c => c.DogOwner).Titled("Owner Name");}).WithPaging(3).Sortable(true)</div></body></html>
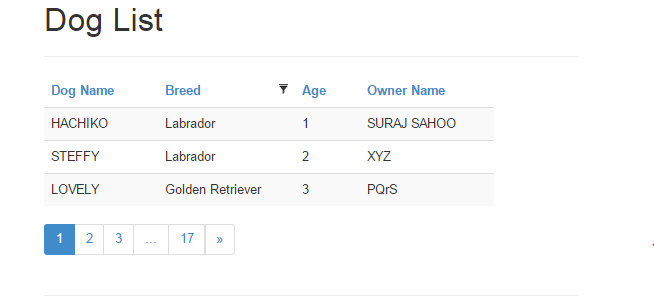
The functionalities like Sortable() accepting a boolean value WithPaging() the value parameter suggests the number of records in the grid & the Titled() is used to add the title of the respective column. You can also see the reference for the StyleSheets(.css) & Scripts(.js) for the gridmvc and bootstrap too. Finally when we run the application using the url : “/SuperDog/Index” we get the below result:
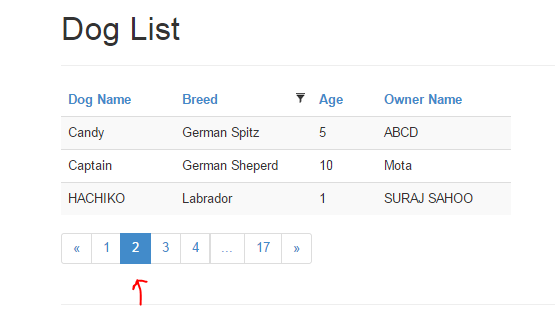
In the next article or part 2 I will show how to create a record and dynamically get the records from the database and bind the Grid.
I hope this would help in creating the grid. You can also download the source code file.