In order to run the Azure, we know the web azure portal where we can modify and manage resources as and when needed. But to manage resources on regular basis, logging into the Portal each time is a hectic job. So automation can solve maximum problems for us. For the automation, we write scripts that keep running in order to ensure the valid logic gets executed.
For the Azure to be automated, we need the azure SDKs. Download the SDKs if not added already. To download the SDK, navigate to the Download SDKs.
There are options for various tools and languages supported by Azure up till date like Java, Visual Studio, Node JS, PhP, Python, RUBY, etc.
We are here interested for Powershell command line tools.
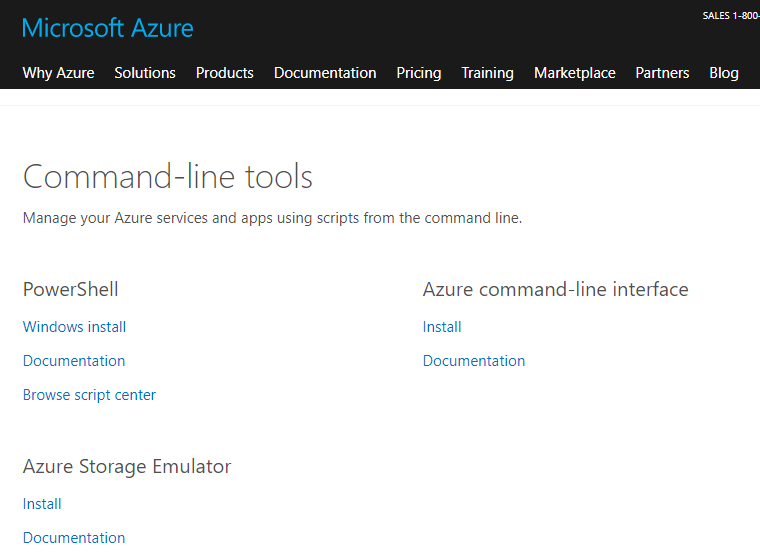
Once downloaded, click and follow the installation rules and then the azure contents would work with Windows Powershell.
Once the powershell azure sdk is installed, open the Powershell with administrator rights.
Then, the first thing we need to is Login with azure credentials and connect to Azure. The command is
> Login-AzureRmAccount
This opens up the Microsoft Azure Login window. Add the user name and password and login.
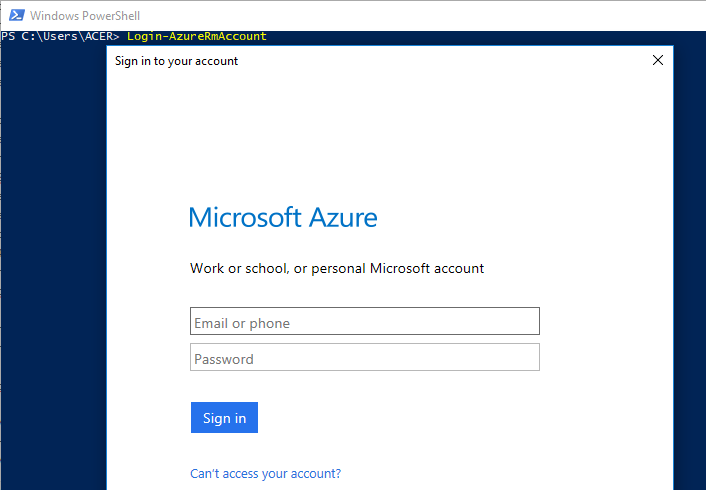
After the login, in the powershell window, we can see the details of the subscription.

Now, if suppose you have multiple subscriptions and want to select a particular subscription, then the below command works out:
//To fetch the subscriptions
 > GetAzureRmSubscription
//To select the particular subscription
 > GetAzureRmSubscription -SubscriptionName SubName | Select-AzureRmSubscription
To get the current subscription details for which we are working on, then the shell script goes like:
//To get the current context of the azure subscription being used
 > Get-AzureRmContext
The above few syntax have AzureRm. Now the “Rm” here means ‘Resource Management’
Getting the list of VMs in the Azure resources under the subscription:
> Get-AzureRmVm //Gets the list of VMs under the subscription
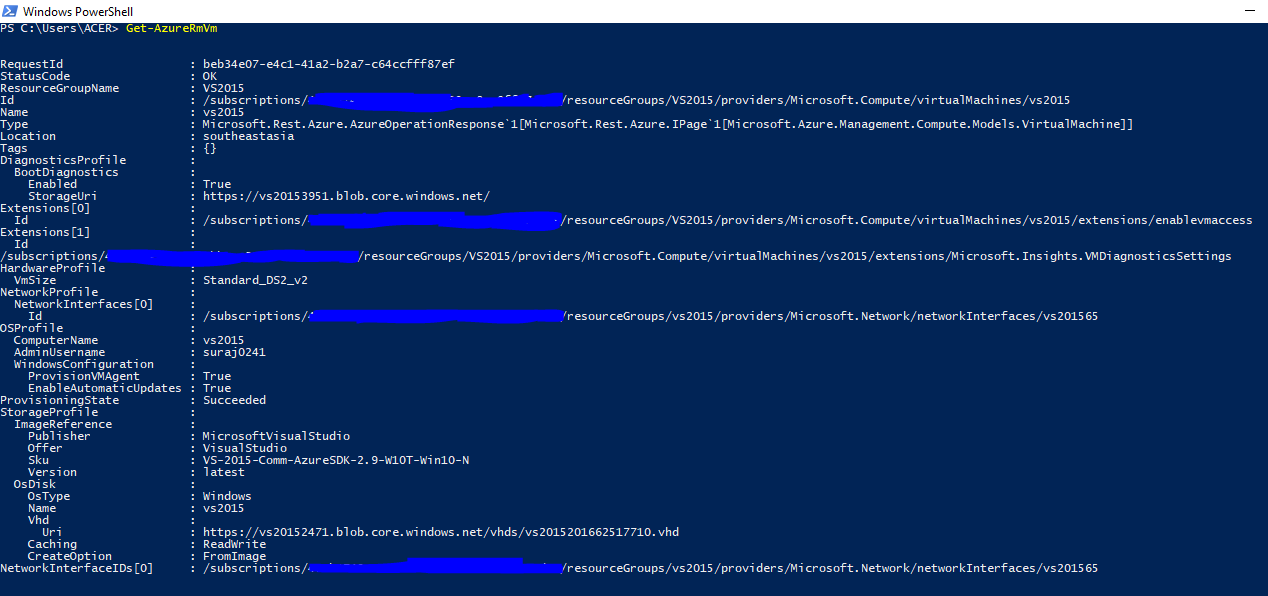
The above image shows, we have a single VM with Resource name “VS2015”. There are other information as well like, disk size, type, OS, etc.
Now to stop the Azure VM, we need to have the below running script:
> Stop-AzureRmVm -ResourceGroupName VS2015 -Name VS2015
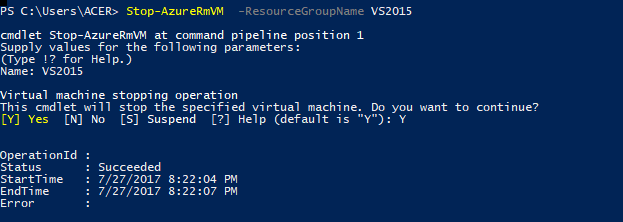
This way we can use the powershell script and connect to Azure in order to use and create Azure services without using the portal. In the upcoming articles we will look into creating other services through Powershell.
Cloud computing can be a complex term now a days, as there are already many services that can run on Cloud. Services like Data mining, Machine learning, creating virtual machines, host APIs for mobile applications and many other endless services.
Microsoft Azure is an open and varied platform, which allows you to choose from a variety of Operating Systems, programming languages. When you build an application in Azure, we will be using specific types of services that would be running on one or more servers on the cloud. We can configure and create Paas services like SQL databases, NoSQL databases, Document DB. Creating app services, and automating the azure services using powershell scripts is what triggers developers to use this. Here in this article, we will look into how to create a Virtual Machine and why to create a VM on Azure.
What is and Why use Virtual Machine?

A virtual machine according to wikipedia, is an emulation to computer system, where emulation would mean to enable a computer system to behave like another computer system (a job of an emulator which may be physical or virtual). A virtual machine can be used on Azure platform on OS like Windows and Linux. The VMs on Azure are highly efficient, high-scale, secure and run on a virtual environment on windows server.
Creating a VM on Azure
Once, you are ready with the Azure subscription and up and running Azure portal. Login to the Azure portal and you see the dashboard.
The dashboard on the portal displays all the services added to the Azure like below:

Click on the New (+) tab & you find another tabbed window displaying all the categories of services provided by Azure. The Virtual Machine is under the Compute service. The options would look like below:

The summary also shows about the sub services. Services like Windows Server Datacenter, which is effective, application focused and user friendly. Ubuntu Server 16.04 Transport Layer Security. Sql server 2016 with SQL server installed on the VM. A normal VM instance, a VM scale which can be used to deploy and also manage identical sets of VMs using a single image and many other compute services.
We would be creating here, a Windows Server Datacenter. Clicking on that option will ask user to configure the Virtual Machine.

Once the configuration is added and OK is clicked, it asks the user for selecting the size of the VM. Remember, the pricing will vary based on the high end configured size (if chosen). Here, I am choosing the minimum configuration DS1_V2 Standard with 1 core. Based on the application we can manipulate the configuration. That is the scaleable option provided by Microsoft Azure. We can anytime scale up and scale down based on our requirement.
Once done click Ok, then the tab for optional configuration. This is the 3rd step. We can move on and click OK to finalize the purchase and get the VM. Once, VM is ready, click on Connect and it downloads the RDP. Using the same username and password we connect the VM and start using the VM.

Its up and running. We can go ahead and configure IIS and run on the server. You can manage your resources using the dashboard and stop the resource whenever not in use so as to avoid consumption of your credits.
]]>With an anticipation and hope, this article would be an interesting and effective somehow. This article will be covering the Asp.Net 5’s MVC6 Welcome application. a brief about the all new concepts of MVC6 and the new structure it beholds. Then we create our first Welcome application and then have a walk through of the new Azure Portal and deploy our first web application.
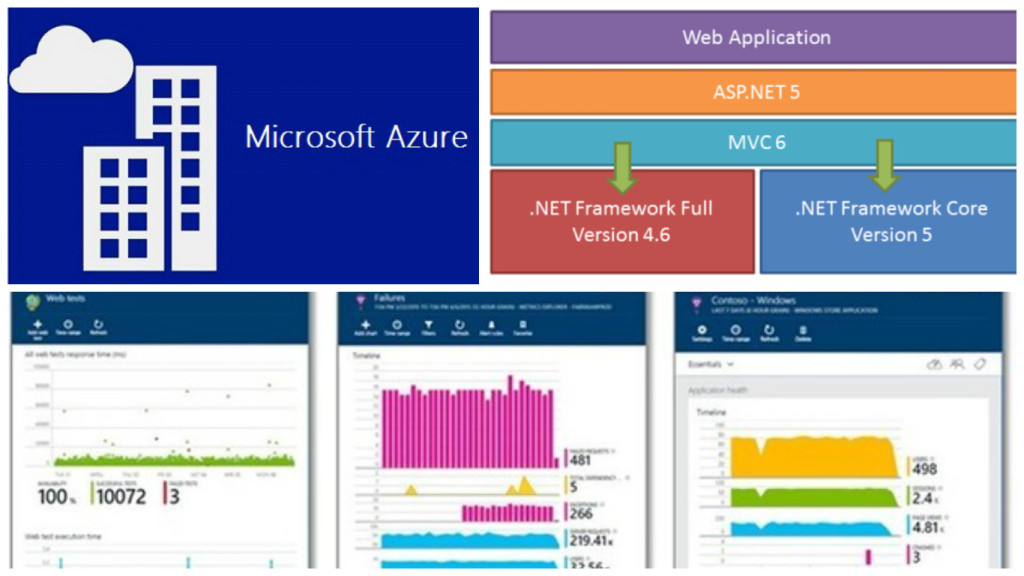
The above image is all that we will be covering in our article.
Get Started
A perfect blend of cloud and web application is what Asp.Net 5 is intended for. Asp.Net 5 is now being called off as .NET core is what that stands out today. It is a framework with open source & cross platform for building cloud based web applications. Here Azure comes integrated to the Visual Studio applications. Web applications either can be deployed to cloud or be running on On-premise. .Net core is available on Visual Studio 2015 build. You can download the community edition of the Visual Studio which is actually free. 
Community Edition Download. Give a try for sure!
.Net 5 core contains a small optimized run time environment called “CoreCLR” One more important point to note is, .Net Core is opensource and the progress can be updated on Github. They have the code exposed and the build can be tracked easily. .Net core is said to contain a set of libraries known as “CoreFx”. Below are the links to the Github. Just have a look:
Another important benefit is termed as “Portability”. What this means is, we can package and deploy the Core CLR which can in turn help you eliminate the dependency on the installed version of .Net framework. Multiple application running on different versions of CLR can be set ups well. This is the magic the team wanted to result out, which is great!
With .NET 5 and VS 2015 comes MVC6 into picture. Microsoft builds are moving faster than the world! 
When I first looked at the structure of the Solution when i added a new MVC project, I was like What!!

Where is Global.asax.cs? Where is Web.config, App_Start?. Did I download the correct files and selected the correct template. These sort of questions were flickering in my mind. When ran the application it ran successfully as well. Strange!!
Let’s have a small trip into the MVC6
Unified MVC Controllers
MVC6, the merger, the blend of three frameworks, i.e. MVC, Web API2 & Web Pages. Previous versions of MVC, while adding a new template would prompt to check whether we want Web API along with MVC. Here we select the MVC project and we get the opportunity to work with API as well.
In previous versions there were two base controller classes, separate for normal controller and also for the Api controller, i.e. ApiController
public class TestController: Controller {

}

public class ApiTestController ; ApiController {

}
In earlier version as shown above, the controller base class were from System.Web.MVC.Controller and for API, System.Web.Http.ApiController. But in MVC6 it is only one, i.e. Microsoft.AspNet.Mvc.Controller.
Different style of HTML helpers
In MVC6 there comes a new title termed as Tag Helpers. They make life much more simpler. How! We will get to know once we see the code snippet.
For normal web pages, as we know the HTML helpers are defined within the System.Web.WebPages.Html under System.Web.WebPages
, whereas in MVC6, it is under the System.Web.MVC assembly..
The HTML helpers which we used to use in Razor or ASPX, were quite difficult for normal HTML developers to understand (suppose designers). Now i MVC6 that has been simplifies using the Tag Helpers.
@using (Html.BeginForm())
{
        @Html.LabelFor(m => p.EmpName, "Employee Name:")
        @Html.TextBoxFor(m => p.EmpName)

        <input type="submit" value="Create" />
}
But in MVC6 ,
@model AzureDemoProject.Models.Employee
@addtaghelper "Microsoft.AspNet.Mvc.TagHelpers"
<form method="post">
<div><label>Employee Name:</label> <input type="text" /></div>
<input type="submit" value="Save" />

</form>
Now the second snippet looks more like HTML friendly and also a bit simple.
Mr. Damian Edwards, has posted the source code on Github which has examples of Tag Helpers. Please go through for better live understanding
Git Hub Tag Helpers Download and play around.
Support for Grunt, NPM & Bower
These are the latest trending front end development tools. These are quite new to me as well,  but will be learning and posting articles on these as well in coming days. Stay tuned!!
Ok branding apart,  lets have a brief idea on what these are.
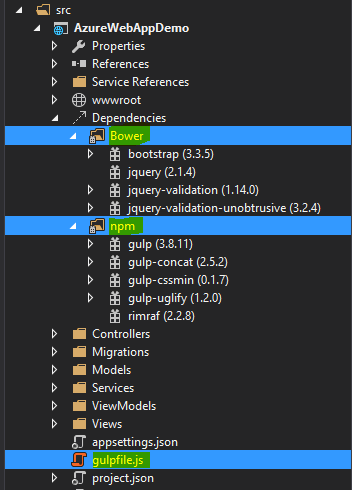
Bower:-This is a client side item added by default to MVC6 project. If not added, then Right click on the project-> Add->New Item
->Installed(Client Side)-> Bower.json. You can find then the file is already installed. The file is inside the wwwroot->lib->bootsrap->bower.json. As you open up the file, you can find the client side tool packages added to the project and their versions. Thus, we got to know that the bower is a client side package manager which is used to add the front-end packages like bootstrap, jQuery, angular, etc.
Grunt:-In MVC6 project when we add, we can find the gulpfile.js, this is kind of an alternative to the Grunt as both perform the same kind of functions. The operations they perform is minification, cleaning, concatenation, etc. of both js & css files.
NPM:- Node Package Manager is present under the project with the name project.json. This holds the dependencies and their versions required by the web application we have set up.
"dependencies": {
    "EntityFramework.Commands": "7.0.0-rc1-final",
    "EntityFramework.MicrosoftSqlServer": "7.0.0-rc1-final",
    "Microsoft.ApplicationInsights.AspNet": "1.0.0-rc1",
    "Microsoft.AspNet.Authentication.Cookies": "1.0.0-rc1-final",
    "Microsoft.AspNet.Diagnostics.Entity": "7.0.0-rc1-final",
    "Microsoft.AspNet.Identity.EntityFramework": "3.0.0-rc1-final",
    "Microsoft.AspNet.IISPlatformHandler": "1.0.0-rc1-final",
    "Microsoft.AspNet.Mvc": "6.0.0-rc1-final",
    "Microsoft.AspNet.Mvc.TagHelpers": "6.0.0-rc1-final",
    "Microsoft.AspNet.Server.Kestrel": "1.0.0-rc1-final",
    "Microsoft.AspNet.StaticFiles": "1.0.0-rc1-final",
    "Microsoft.AspNet.Tooling.Razor": "1.0.0-rc1-final",
    "Microsoft.Extensions.CodeGenerators.Mvc": "1.0.0-rc1-final",
    "Microsoft.Extensions.Configuration.FileProviderExtensions" : "1.0.0-rc1-final",
    "Microsoft.Extensions.Configuration.Json": "1.0.0-rc1-final",
    "Microsoft.Extensions.Configuration.UserSecrets": "1.0.0-rc1-final",
    "Microsoft.Extensions.Logging": "1.0.0-rc1-final",
    "Microsoft.Extensions.Logging.Console": "1.0.0-rc1-final",
    "Microsoft.Extensions.Logging.Debug": "1.0.0-rc1-final",
    "Microsoft.VisualStudio.Web.BrowserLink.Loader": "14.0.0-rc1-final"
  },
 "scripts": {
    "prepublish": [ "npm install", "bower install", "gulp clean", "gulp min" ]
  }
As we can see in the above snippet, which is just a part of the project.json file. This is to show the default dependencies added to the project and the pre publish scripts mentioned. When we suppose add a new dependency, suppose I try and add System.Linq, it will list up the Nuget package as intellisense and then we add the version which also comes under the intellisense. Like below image:

Then after hitting Ctrl+S, the restoring of the references packages starts.
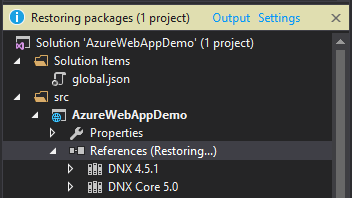
Then we see the references added. For more information on the project.json file and its contents, please visit the below link:
Project.json
Integration to Cloud & optimized: This is another major boost feature added to MVC6 application. Now it comes integrated to the cloud with Microsoft Azure and also the optimizing and monitoring tool provided by Azure, i.e. Application Insights.
We will have a walk through of adding the cloud Web application and then a brief on Application insights as well.
Boosted Dependency Injection: Now MVC6 application has in built and integrated dependency injection facility. There is no more need for the packages like, Ninject, Unity, Structure Map3 and all. The code for the configuration setting for the dependency injection is added inside the StartUp.cs class file as below:
// This method gets called by the runtime. Use this method to add services to the container.
        public void ConfigureServices(IServiceCollection services)
        {
            // Add framework services.
            services.AddApplicationInsightsTelemetry(Configuration);

            services.AddEntityFramework()
                .AddSqlServer()
                .AddDbContext(options =>
                    options.UseSqlServer(Configuration["Data:DefaultConnection:ConnectionString"]));

            services.AddIdentity<ApplicationUser, IdentityRole>()
                .AddEntityFrameworkStores()
                .AddDefaultTokenProviders();

            services.AddMvc();

            // Add application services.
            //Dependency Injection as well
            services.AddTransient<IEmailSender, AuthMessageSender>();
            services.AddTransient<ISmsSender, AuthMessageSender>();
        }
The we normally inject the services into the constructor of the controllers. Is’nt that great!!
appsettings.json: As we know there is no Web.config file in our application, but we need to have a place where we have the settings required by the application at all stages. This is this place. In MVC6, they have had a upper hand over the JSON than the XML.
The connection strings, the other app settings file we used to add inside the Web.config will now be contained here, that to in Json format. An example like below:
"Data": {
    "DefaultConnection": {
      "ConnectionString": "Server=(localdb)\\mssqllocaldb;Database=aspnet5-AzureWebAppDemo-XXXXXXXXXXXXXXXXXXX-XXX;Trusted_Connection=True;MultipleActiveResultSets=true"
    }
}global.json: This is a separate folder named Solution Items. here is the global.json file, which contains the solutions’s project references and their dependencies as well. Loos like below:
{
  "projects": [ "src", "test" ],
  "sdk": {
    "version": "1.0.0-rc1-update1"
  }
}
The appsettings is initialized into the project in the Startup.cs file as below:
var builder = new ConfigurationBuilder()
                .AddJsonFile("appsettings.json")
                .AddJsonFile($"appsettings.{env.EnvironmentName}.json", optional: true);
The App_Start which had the RouteConfig.cs file also goes missing. In MVC is present inside the Startup.cs file as below:
public void Configure(IApplicationBuilder app, IHostingEnvironment env, ILoggerFactory loggerFactory)
        {
               app.UseMvc(routes =>
            {
                routes.MapRoute(
                    name: "default",
                    template: "{controller=Home}/{action=Index}/{id?}");
            });
        }
Thus, lets have a look at the entry point of the application:
// Entry point for the application.
        public static void Main(string[] args) => WebApplication.Run(args);
Another nice feature is the segregation of the Models & View Models. The Model now only will deal with the Db Entities and the context, where as the ViewModel will deal with the model classes which are required in the View binding.
This was just a brief about MVC6, more information and application building will be shown in the upcoming articles on MVC6. Now lets jump start the deployment to azure.
![]()
Head start Deployment
Now lets discuss creating a new MVC6 project from VS 2015 and then deploying to Azure, mostly I will pictorially explain you which will help understand better.
- Step 1: Create a brand new project from the Visual Studio 2015 templates. Select the cloud directly and then the Web project as we will be deploying our application to azure.
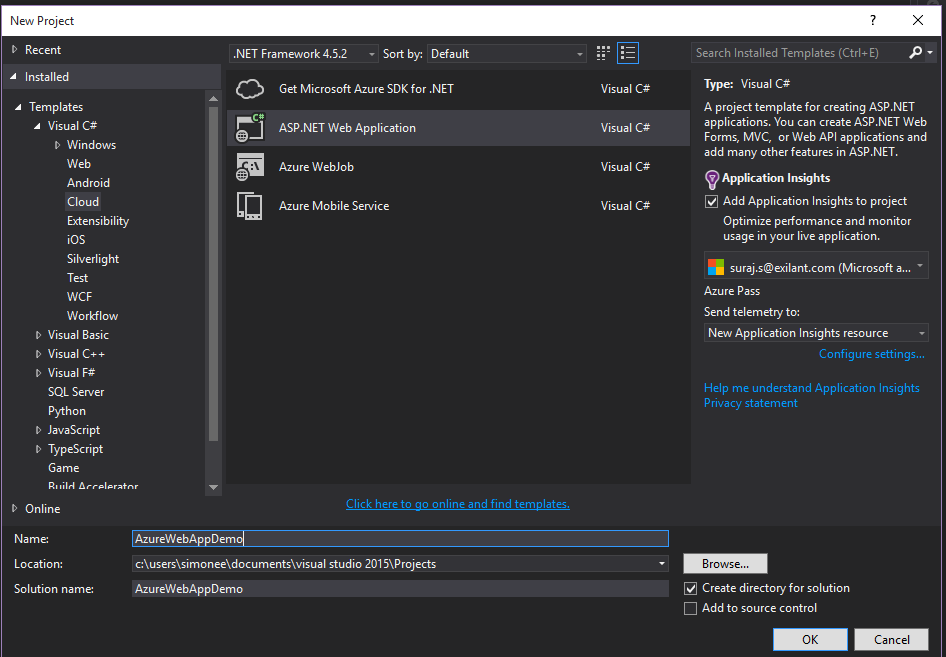
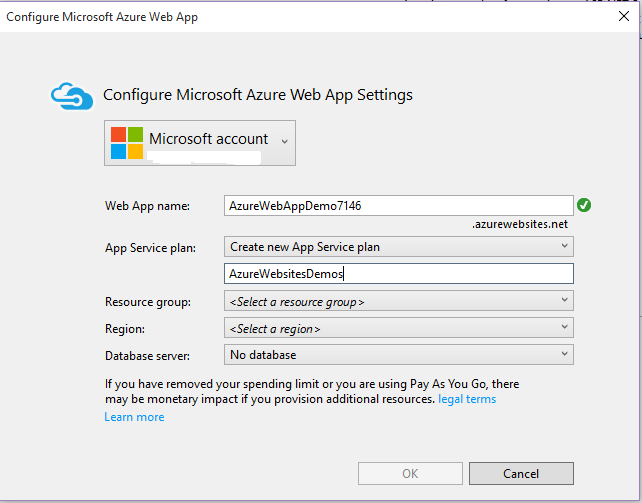
- Step 2: Then after giving name for the project, another window will prompt which will ask for the Microsoft Azure configurations. Web App Name, which will actually be the URL for the application after hosted on cloud.
Then asks for the Application Service under which the application will be registered and deployed.
Region is another important factor which might come handy in the performance of the application. Thus, we select East Asia here.
If asked for the Database server and the application required we add a new database server or use any existing database. We skip for now the database integration.
- Step 3: After setting up, we land in creating our first web application and the structure is like below:
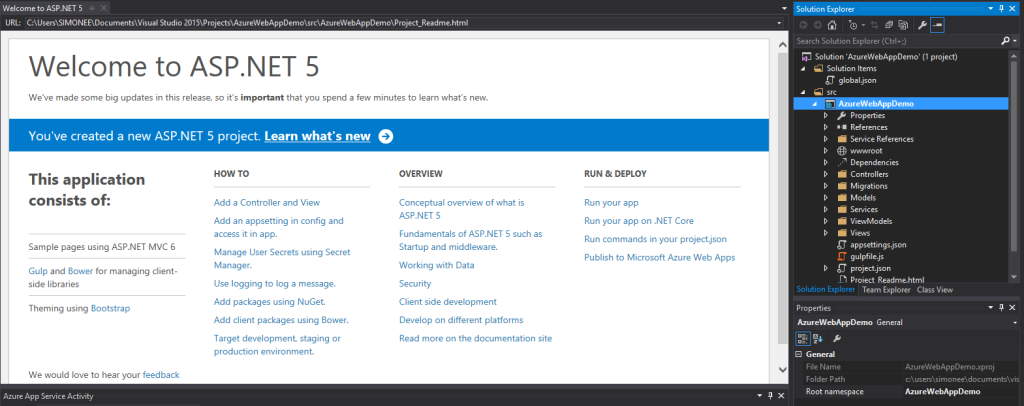
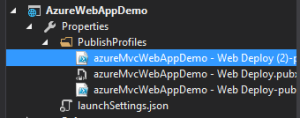
- Step 4: Lets have a look at project structure which gets created.

- Step 5: Lets now publish and deploy our web application. Right click on the project and click ‘Publish’. We then see a window pop up like below:
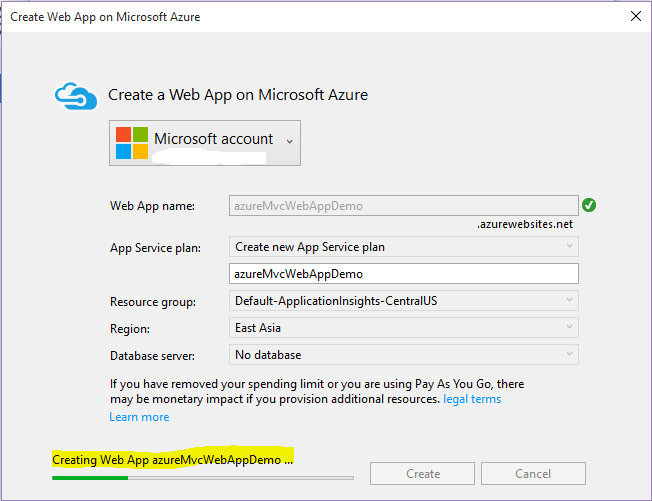
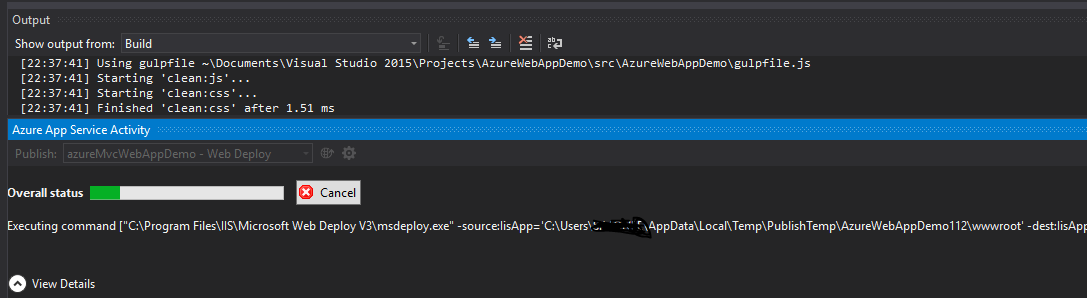
- Step 6: This will now create an Application Service(Webservice) on Azure portal and also deploy our Web Application as a new Website. The status can be seen under Azure Activity :

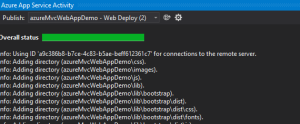
The above images are the over all status and the name of the publish package that got deployed. -
Step 7: Then navigate to the Azure portal, already notifications would be highlighted to let you know that web site is now hosted and you can browse.
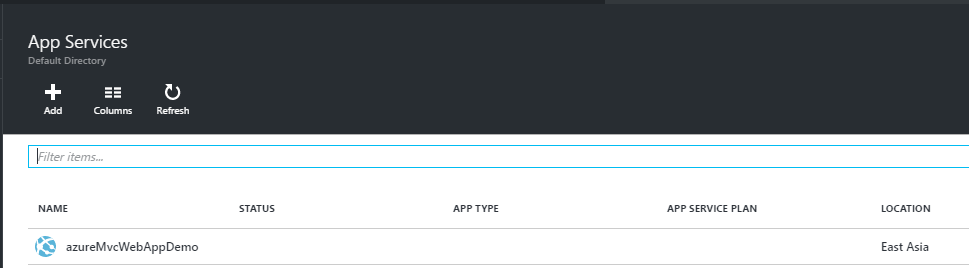
The status app type and the app status will update in a few minutes.


Conclusion
Thus, once the website is hosted on Azure, we can browse and run our application and share with anyone to navigate through our application. We came to know in this article how easy it is to deploy to cloud in the latest builds, making the lives of developers much easier. I will be sharing and covering the Application Insights in the next article which will follow this up. I hope this has helped in learning some facts about MVC6 and please post your feedback. Application Insights– upcoming.
References
]]>Cloud! Cloud! Cloud! What is this cloud! What is Azure! What is cloud computing again!
Oh! So many questions, when we get into this software industry. We will discuss about cloud computing and then move to Azure.

Cloud computing is one the most hyped and most demanding is the industry now.It is actually a paradigm shift for providing computing over the internet. Innovations are what now the companies are looking forward to. Cloud computing is a big enemy to On-premise computing which has been prevailing since long and is still in process. Now what is On-premise computing, when the solutions are installed on user/user’s systems, whereas cloud provides solutions via the Internet. Cloud computing now no longer wastes your time and space with installing the hardware, servers physically, it just needs a good reliable internet connection.
Cloud comprises of various virtual Data Centers that provide different software, hardware & information resources/services. Organizations now just need to connect to the cloud and use the available resources based on their requirement.
Cloud computing for organizations can be done in three ways:

- Private: This is only for one organization and is totally secure as the name itself is private.
- Public: This is acquired and managed by the cloud service provider and it provides the highest level of efficiency for the resources provided by the cloud provider.
- Hybrid: This is the blend of both private and public, where few resources are added and managed in under the public i.e. the cloud provider and few other resources are managed by the organization. This also provides increased efficiency.
We will now learn more facts and information to make our understanding on cloud clear ..:D

Microsoft Azure
Microsoft Azure is a cloud computing platform provided by Microsoft, previously named as Windows Azure. Lets have a pictorial view of what Azure can provide:

This is what the summary is about azure. All the overheads i.e. the Operating system to be used for the application we develop, the network on which we have the application set up, the storage space and how scalable is the storage used, Monitoring the performance of the application. These are few important things we note and keep in mind before developing an application.
Just imagine, how it would be if we have a provider which will handle and manage for us and let us only focus on our application development? Would not that be just great? Here come the hero, Microsoft Azure.
Microsoft Azure, the cloud service provider provides us with all the required resources.
According to Garnet,
A style of computing in which scalable and elastic IT enabled capabilities are derived as a service using the internet technologies.
Below image shows how the Microsoft Azure portal looks like:

The above image shows the various resources Azure portal provides us.
App Services: These are the Web app services on which we deploy our websites in general. Suppose we create an MVC application and want to run on Azure, we need to create a web app service on which the Website will be deployed and running.
Virtual Machines (Classic): As Microsoft suggests, the VMs are the same but the classic mode denotes that the old platform/portal is outdated but the API is still intact. This will not support the newest resources added, whereas in new mode, it supports the very new and updated added resources.
Sql Databases: This as discussed below also, helps create a database for the application. The creation would need a new or existing server on which it will run and also based on location. we have discussed more on this below.
Cloud Services: It is one of the PaaS services provided bt Azure. This can simply be thought of as a collection of number of VMs which in turn would have software installed on them.
Microsoft Azure runs on three basic structures. Iaas, Paas & Saas. Lets discuss about them in brief below:
Iaas (Infrastructure as a Service)
Infrastructure as a service when used by the organization, provides the infrastructure resources required for the build. Here you are concerned only for the service we get from the Infrastructure, for example Database service. Microsoft provides with the Remote Desktops, Virtual machines, Servers as IaaS resources.
PaaS (Platform as a Service)
This is the platform which Microsoft Azure provides required for only development. Here we only need to focus on the development, maintenance and management of the application. Azure SQL Database, HD Insights, Application Insights,Azure Storage, Active directory are all a part of PaaS of Azure.
The difference would go like, PaaS have more economic advantage than IaaS, where as IaaS has more control over the entire resources being used may it be, OS, servers, VMs, etc.
Lets see an example how we can add a IaaS service and PaaS i.e. for instance Database (SQL):
At first as we have seen the azure portal above in the image, now we click on SQL Database and then on Add like below:

Then we will see a new tab besides the above tab on the same window like below:

This is the new portal style in which the tabs open up side by side, whereas in earlier portal, every time a new tab was overlapping the clicked tab.
Here on this image, there are many things we need to know. Remember we are going to add a new Sql Database.
First it asks for the database name, enter the name. Then the next box is for the Server name. Once you click on the Server, the tab opens up with options such as Create a new server or use existing. Here I am adding a new server instance.
Another interesting thing to mark is Location. Out of different options, be decisive and wise in choosing the location based on the nearest location to the deployment server, to decrease the latency rate.
Here, while creating the database, we created a new Server instance with a name and location. The Server here acts as IaaS and the Database as PaaS.

Virtual Machines (IaaS):
There are a lot of services provided by Microsoft Azure, while adding a new virtual machine, we have options for adding as a Windows Server, Linux, Joomla and many more pre-build images. Interesting is they provide you with an image of Sql Sevrer. We take this as an example and see how to add VMs.
As you see above, when we select the Sql Server as our VM, it means it will create a Windows Server with Sql Server (* version) installed on it. The list of versions is shown in the image. i would be selecting 2016 instance and lets see what happens.


When we click the Sql Server version to be created, the above tab pops up, to configure the settings for the VM. The above details are just names and password you would be using for login.

This the VM configuration, the windows server configuration on which our SQL 2016 would be installed. Select any one and proceed with the other configuration. The next are default setting, you may change also based on your need.
Then finally hit Ok to create the VM, it will start the initial deployment and after submitting the deployment, it will take few minutes, to complete and set up the VM for you to download the VM instance and use using Remote desktop connection.
The configuration can be seen on All resources and on click of the virtual machine.
As you can see here, the OS is Windows, and every Virtual Machine requires a Virtual Network to be created, so while creating the virtual machine, a virtual network is created in the setting, if wished the name of VN can be changes as in this case it is, surajsql2016.
Then after the VM is updated and set up is completed, you will get a notification regarding the same.
Then hit Connect, this will download the .rdp file. Then as you know the process, add the username password you had set up during the configuration of VM and play around on the Server with SQL 2016 installed on it.
SaaS (Software as a service)
This is an interesting concept provided by the cloud. This lets users access to online applications like Sharepoint online, MS Office based on subscription. This can also be termed as software delivered over internet/web. We need not worry about the installation the bit information, OS, etc before using the product/software.
Here comes another interesting fact about microsoft azure. The Pay as you Go model.
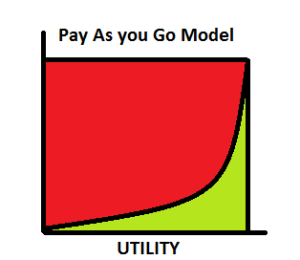
Here the payment is like the electricity use. You pay only when you use. That is called utility. You are not asked to pay for units that you have not used at all, right? May sound weird but true.
Microsoft Azure also follows the utility graph. It is the green in the graph. Only pay for the services you use and that are up and running. Is’nt that great! economical..:)
Conclusion
Thus, here we just had a brief idea about what the Cloud computing is, why Microsoft Azure, the architecture, different platforms. I upcoming modules we will have a detailed walk through of the Azure portal and learn how to create an MVC application and deploy to the Azure app service.
Resources:- Google Images, Microsoft Azure Site