Today, the world has grown so much and has been so friendly for the developers, thousands of tools floating in the market for free, but we need to realize and have them in our bucket whenever required.
I will be discussing few important tools, which are handy and work out for every developer.
Tools!!
FIREBUG 
The best tool for the developer which can be installed on FireFox (add-on). This helps monitor the structure of you HTML, CSS and also javascript. To add the Firebug and get it going add now!
Add FireBug
A web development tool which will help any developer track the issue with the client side and also track the response time for the requests in the network tab.
The tool tab looks like below:

POSTMAN
This is a very important tool, which is a restful api client, which helps developer not waste time debugging and every time running Visual Studio to check the result set and how the api behaves. We now just need to call the url of the API from Postman and it gives us the result, even the status code as well.

Get POSTMAN for Chrome
This will allow developers to request any API, may it be GET, PUT, POST or DELETE.
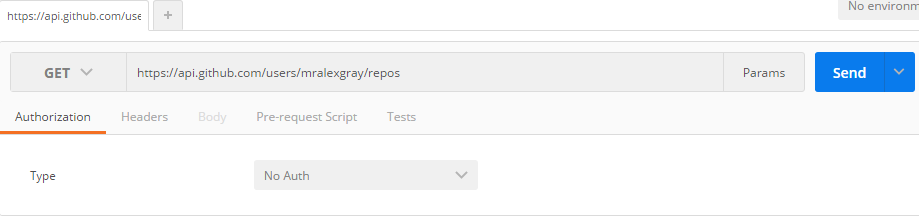
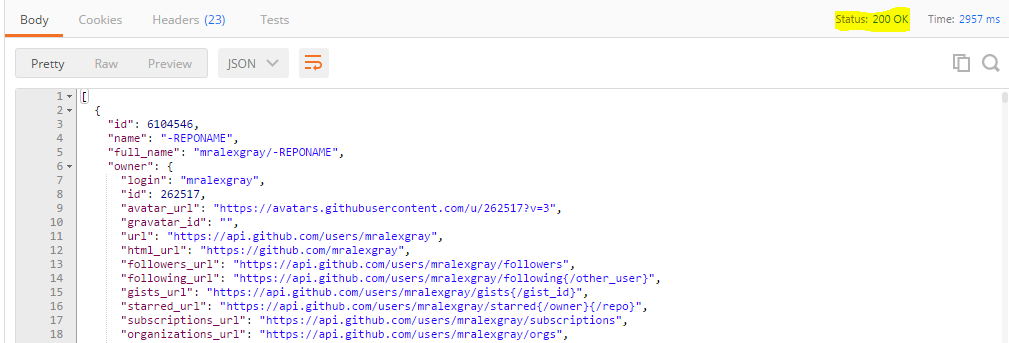
I made a get request to a exposed github API to show how the POSTMAN reacts and shows us the Json result also the response time and the Status(200 Ok, 404 Not found, 403 Forbidden).
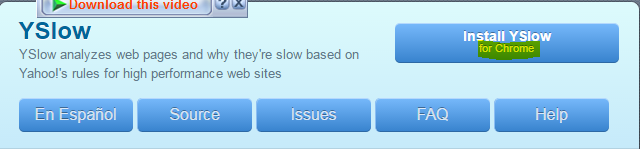
Yslow 
This is such a powerful tool for any developer developing any web application, which without any fondness to anyone, ruthlessly shows how good your web app is and how good it will behave? The below image says it all:
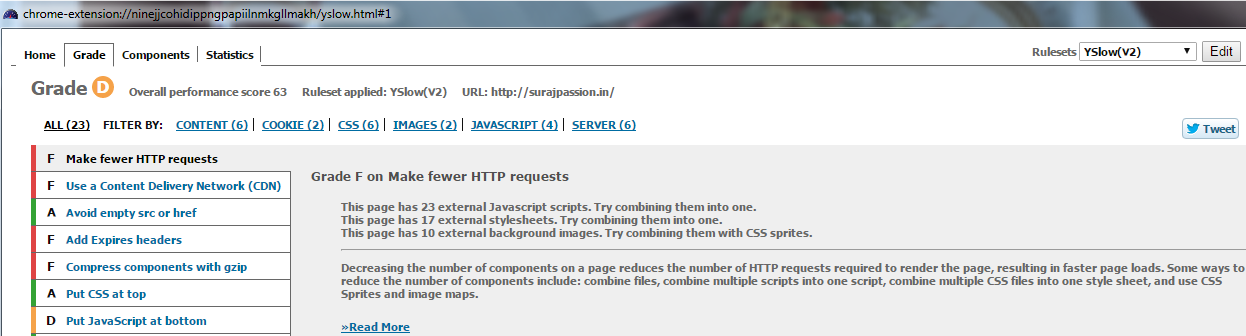
The above web site has been given a Grade ‘D’ by Yslow. This also gives a description of why the grade is low, what can be modified or implemented to improve your grade. Here, it also lets developers know for bundling and minification for the javascript and the style sheets. So use it and improve the performance of your web app.
Install the Yslow now:
Add Yslow
Css Sprite Generator
Sprites is a collection of images put together into a single image. So instead of adding multiple images and heavy-ing the web page, we can prefer sprites with images and using css to generate and display on web page.
Css sprite generator add on tool helps you create Sprites. Sprite Cow also helps you generate sprites and also the css to use on your web page.

Web developer
This is a very interesting add on for every developer. This has a lot of features added to it and each of them is useful while developing.
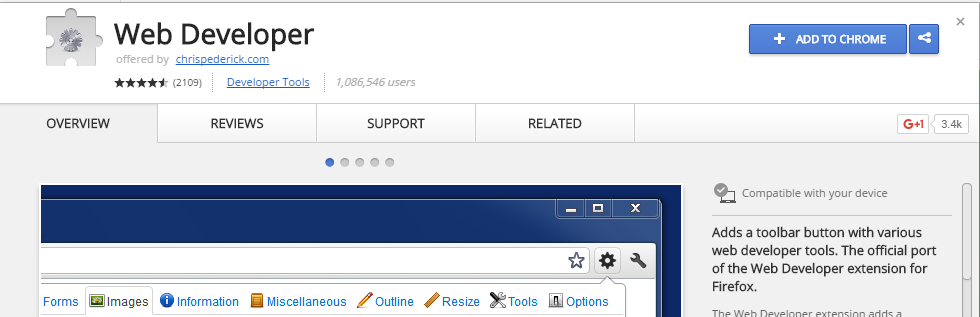
Web Developer Add on
Add the web developer add on and play around there are a lot of features out there for you.

There are features for Css, forms, javascript, images, cookies, etc.
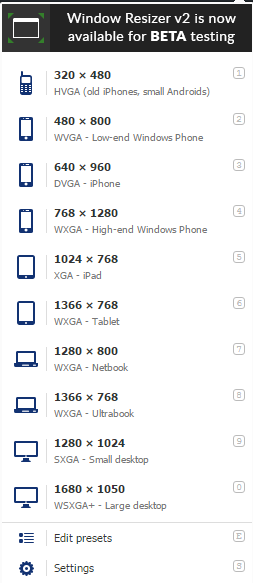
Window Resizer
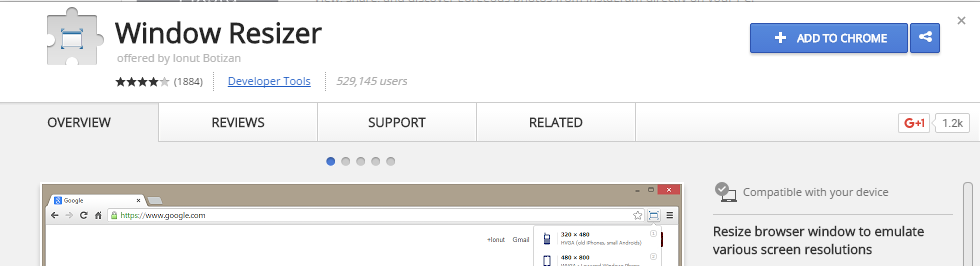
Another helpful tool for every developer, as now a days every web app is being designed to be responsive. Developers add css and html to make it responsive, but it is not possible for developers to test on every possible devices which end users would be using. This helps you resize your web app window and test if the pages are responsive as expected.
Add and play with it.
Window Resizer Add on
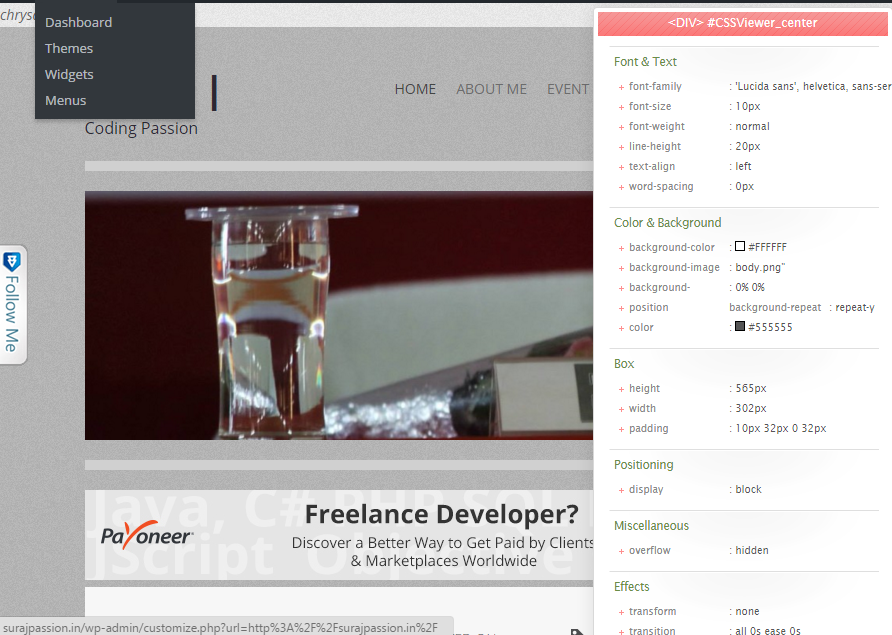
CSS Viewer
An interesting tool to be used, as it lets you view the css being used on the web page. This helps check the css hovering over the web page area.
CSS Viewer Add on
The add after added on web page looks like below:
Cache Clear 

How many times we developer face the wrath from the testing team, that this is not working this is breaking and what not! And we ask them to do just one thing, “Please clear your cache”! and then everything works! Here is an add on which helps you clear cache for the application on click of a tool tip only.
Add and recommend testing to add as well. 
Clear Cache Add on
Angular Batrang 
Angular being the king now, every developers starting to learn and use Angular. This is a very nice tool to be used on Angular application, if they wish to track the scopes and angular objects and how they behave!
After adding the extension, in the developer tool, it comes as an add on and you can navigate and play with it on your angular web app.
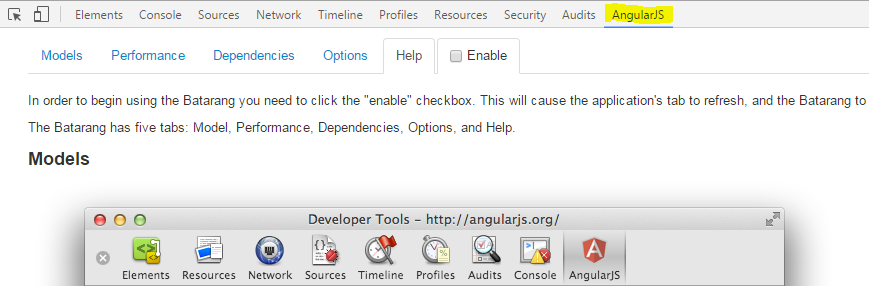
Angular Batrang Add on
Conclusion
These were few important developer tools, which I use in my day to day development and I hope this will help few developers as well as they are very useful once you start using and exploring them. Play around and you will be addicted to them. I hope readers will share their views and share which other important developer tools they recommend.
Come on! Recommend and share your views!

As we discuss in the previous part of Hands on Agular Js-I about the basic and the architecture of the Angular Js and few directives. Here in this part we will check out the other important directives and how Angular interaction with Controller and model is being done on the go. The directives we will discuss in this part of series are very important in order to start and feel the magic of Angular. Here, actually, we get into the depth and controls of Angular. Let’s watch out. 
Angular directives
Here we start with the other important directives that would come handy while working on the Angular.
ng-module
Angular modules are the most important directive, they define an angular application. They are the parent set for the other directives or functions of the application, like controllers. Controllers are always contained withing the modules, along with other dependencies. This is the modular approach in Angular. Creating modules for separate section segregates it and create partition/module wise applications.
The modules are defined syntactically as below:
var app = angular.module("app-Services", []);As per the above snippet, we have created an angular module and assigned it to the variable named app. The module name is app-Services. The module is actually defined in the document function of a separate Module script file and reference added to the file wherever required. The definition provided by the Angular Doc is that Module is required to configure the $injector and it contains the services, directives, controllers and other dependencies.
$injectors are the service used to retrieve the pre-defined object instances, invoke methods and load the required modules.
ng-controller
This is another set of directives that defines the controller of the application, which controls the data of the application. They are simple objects defined under the scope of the module. There can be any number of controllers for a specific module. Controllers are defined syntactically as:
var app = angular.module('app-Services', []);
app.controller('myFirstController', function($scope) {
    $scope.firstName = "Suraj";
    $scope.lastName = "Sahoo";
});
The above snippet is a simple controller defined under the module app-Services. The name of the controller is myFirstController and under its scope, two members are initialized, that is firstName & lastName. Thus, when an object of controller is created in the html, which we will see below:
<html>
<body>
<div ng-app="app-Services" ng-controller="myFistController as ctrlFirst">
<span>{{ctrlFirst.firstName}} {{ctrlFirst.lastName}}</span>
</div>
</body>
</html>
Thus, as we see above, the html tag div has the scope for the Module we defined above and the controller defined for the module with the members firstName & lastName. When the controller is instantiated inside the scopr of the div and Module, we have th right to access the data defined inside the controller function. $scope defined within the controller function is is the context via which the model execution is implemented inside the controller. It actually acts as a watch on the model values while binding to the DOM element in the HTML. The $scope can also be used using the this object. The controller also accepts the $http to execute the http services in order to call the api’s to get post and delete any data through the services. Lets see how the controller function can be separated from the declaration and defined as a function.
var app = angular.module('app-Services', []);
app.controller('myFirstController', myFirstController);
function myFirstController($http, $scope) {
    $scope.firstProperty = 'XYZ';
    $http.get('your url').then(function (){
                          //do whatever..
                  }).catch(function (){
                         //do whatever..
              }).finally(function (){
                       //do whatever..
          });
}
});
Now the above, $http is the http module which is used to call the get and post methods or to interact with the server to fetch the records. Call the url, like in ajax we have success and error methods, here we have, then() block, which after fetching successful response, has the logic what to do next. Actually, the $http returns a promise, so we catch that in the then block and attach the response to the scope. The different $hhtp methods are:
- $http.get:- To retrieve information from server for a url requested by the user
- $http.head:- Transfers only the header and the status line only, but is same as GET
- $http.post:- As self explanatory it is, it is used to send the information entered by user to the server.
- $http.put:- This is same as the POSt but is used to create the current reprsentation of the target resource or overwrite it for the same URL
- $http.delete:- This ensures that the current resource for the requested URL is deleted by the server.
The catch finally is same as the try.. catch.. blocks, where inside the catch we can also have the ‘then’ block in order to perform tasks after catch and similarly the ‘finally’ block to ensure what finally the code block will execute.
Filters in Angular JS
These are very interesting features provided by the Angular, which can be frequently used and with ease. We will discuss below the pre-defined filters provided by the framework. We will see the use syntactically after the line by line explanation.
- currency:- This is used as the name suggests, convert a simple number into the format of a currency.
- date:- This is used to format dates in different formats.
- filter:- An interesting filter which actually filters few data from a set of result set data.
- json:- formats an normal object into JSON format
- limitTo:- limits an set of array to specified number of elements or objects.
- lowercase:- converts/formats an string to lower case character.
- number:- formats a simple number into a string.
- orderby:- Orders an array based on an expression.
- uppercase:- Formats the string into a upper case character.
Lets see the work around using the snippets:
var app = angular.module('app-Services', []);
app.controller('myFirstController', function($scope) {
    $scope.firstName = "Suraj";
    $scope.lastName = "Sahoo";
});
<html>
<body>
<div ng-app="app-Services" ng-controller="myFistController as ctrlFirst">
<span>{{ctrlFirst.firstName | uppercase}} {{ctrlFirst.lastName \ lowercase}}</span> //Displays firstName is UPPERCASE and lastName in lowercase
<ul>
  <li ng-repeat="name in names | orderBy:'age'">
    {{ x.name + ', ' + x.age}}
  </li>
</ul>
<span>{{price | currency}}</span>
<li ng-repeat="name in names | filter : 'S'">
    {{ name }} //Filters names based on names containing 'S'
  </li>
</div>
</body>
</html>
In the above snippets, we have used another directive i.e. ng-repeat, that is used to loop through the list of records just like foreach loop.
Another thing here to note is that the filter used in the above snippet, if we use the object containing the data or list of records/names suppose like:
<p><input type="text" ng-model="nameFilter"></p>
<ul>
  <li ng-repeat="name in names | filter:nameFilter">
    {{ name }}
  </li>
</ul>
What the above snippet does is, it loops through the names and based on the entry in the textbox or the user input, Like suppose user enters ‘S’, then the data listed are filtered on the object with the names that Starts With ‘S’.
Thus, we saw how these filters become handy and really useful.
Conclusion
Thus, here in this part we discussed about most of the great features of Angular and saw a few snippets to be used in progress. As I said earlier, in the succeeding modules we will gradually come across more interesting features and overall use of Angular.
Whats Next??
We will next come across how to build applications using Asp.NET MVC, EF Code First, Angular JS. That I assure would be interesting.
References
W3 schools
docs.angularjs.org
A simple and effective article which might come handy while developing web applications.
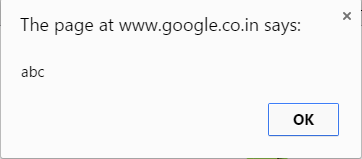

Oh not Again!!
We add efforts designing a beautiful website but still sometimes use the javascript’s old alert pop up or any modal or window pop up. But that can be now avoided by this beautiful plugin. This is free dynamic and easy to use and manipulate. It is SWEET ALERT created by Tristan Edwards. This provides great dynamic and good-looking interface and acts same as the alert pop up.
Lets have a look at the difference once!!

The old alert is shown above and rather should be an imprint in any developer’s mind..  Now below is the alert by Sweet Alert, which is truely sweet.
Does’n this look professional and goes with the websites being designed now!!
Wondering about the syntax!! Its is simple and same as the javascript alert.
swal("Welcome to SWAL");Now lets get into the other secrets of SWAL and `beautify!!
More facts and Secrets of SWAL
We can do a lot many interesting things using this simple tool. Let’s check out.
We can add explaination or text under the alert message, unlike in JS alert, whatever we add comes as single statement. Lets see how!

The code again for this goes simple as
swal("Welcome to SWAL","Is'nt this pretty!!");
We can add icons to update user with more information and in a more interactive manner!
Lets check how!

This is a success message, like we can have suppose success message alert for Addition of Detail is Success, or Update or Delete is sucess.
The code goes like below:
swal("Welcome to SWAL","Is'nt this pretty!!","success");This comes with an animated success icon. Once you try, you will get the feel.
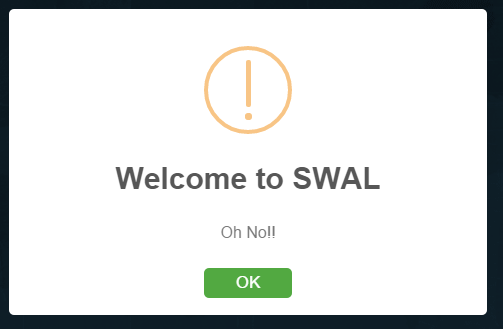
There are cases we may get some server error. We may track the error on ajax and display some alert to the end user regarding that. The above code with just a minor change would display a error icon with animation as well.
The code looks like:
swal("Welcome to SWAL","Oh no!!","error");The alert looks like below:

There are cases we may get some validation error from users or some kind of confirmation from user if he/she wants to continue. In that case swal provides warning icon.
The code looks like:
swal("Welcome to SWAL","Are you sure!!","warning");The alert looks like below:
Another interesting option is the alternative to confirm(“Are you sure!”) with a Ok and cancel button and on Ok do what !! Lets have a hand to it using SWAL:
swal(
        {
            title: "Are you sure?",
            text: "You are deleting this completely!",
            type: "warning",
            showCancelButton: true,
            confirmButtonColor: "#DD6B55",
            confirmButtonText: "Yes, delete it!",
            closeOnConfirm: false
        },
        function(isConfirm) {
            if(isConfirm){
             swal("Deleted!", "Your file has been deleted.", "success");
            }
        });
The above snippet is only a confirmation and if confirmed then what to do. Here a success alert is displayed that file is deleted.
We can also format the text in HTML format, display any image or any other sort of html manipulation inside the alert pop up. Check below:
swal({
        title: "HTML <small>Welcome to SWAL</small>!",
        text: "A html format <span style="color: #f8bb86;">html message.",
        html: true
    });
</span>
There are a lot of more stuffs which we can do and enjoy. Please check the detailed explanation in the below link:
SWAL
Downloads
SWAL required only a CSS and Javascript files to be added to your layout and done! Below is the direct download link to get the files
Download SWAL Zip
Conclusion
I hope this simple article comes handy for many in future and help developers give a wonderful look and feel and make their clients happy.. 
Still using images for icons!! Now in every other web site/web pages, we find intensive use of icons to help user navigate and understand easily the whole purpose. Making the icons simple and understandable from user point of view is what the motive stands here. But using images for icons!! would that be fine!!Would not that affect the page performance as the image has some size right readers!!Let me introduce here to you a small package upgraded and light-weight and easy to use which makes the GUI so simple to implement. Lets get started..
Getting Started With Font-awesome
As the name itself suggests, this package is awesome. From a github post,
Font Awesome is a full suite of 519 pictographic icons for easy scalable vector graphics on websites, created and maintained by Dave Gandy.
These are simple text, which can easily be manipulated like normal texts using the fonts. You stretch or enlarge an image(.png) icon it gets blurred, it looks bad in simple language. You enlarge any font from the package of fontawesome it would never get blurred or pixalated. Moreover no width no height is required as used in image as attributes, just increase the font-size, it manipulates the icon.
The best thing is this package can be downloaded from the Nuget Package or the Package manager console too. The below image will show how to install the package from the PM Console.
As you can see in the above Image, you need to get to the PM Console window and hit the yellowed Install command.
Install-Package font-awesome -Version 4.1.0
After Installing you may face some error for the assembly package. That is the dependencies on this library and their version may cause some issue here. As for example which I have encountered while adding in my project was the assembly Web.Optimization as this version of this library require varsion 1.1.3. . If any package upgradation/update is required as its dependencies then without any hesitation just update the packages. Infact, the updates for the packages should be checked and updated regularly. After adding the following files/folders get added to the web project.
When added/installed two css files are added for the font-awesome. To a shock,both the files are same, now wonder why then both??Because a small difference between both matters a lot: .min.css is the minified version of the css file that is small light and good for performance. So, while adding the reference in the layout, minified version is preferred/made mandate actually.
The other thing that gets added is shown in the above image.
Lets get some information about the extensions of the files inside the folder. Information are from WIKI:

.eot :- Embedded Open Type fonts are a compact form of OpenType fonts designed by Microsoft for use as embedded fonts on web pages.
.svg :- This is common and known, but still, Scalable Vector Graphics (SVG) is an XML-based vector image format for two-dimensional graphics with support for interactivity and animation.
.ttf :- This is developed by Apple, stands for True Type font. This means the font can be scaled to any font size even without tampering the quality.
.woff :- Stands for Web Open Font Format. This is a font format to be used in the pages rendered on web, that is Webpage.
.otf :- Stands for Open Type Font
This was all about the extensions of the files in the folder.
Usage
To use this as I have already mentioned, we need to have the minified version of the .css file in the layout itself, as the icons would be used intensively. The reference goes as below:
<link href="~/Content/font-awesome.min.css" rel="stylesheet" />
Now to use the class out of the .css defined classes, the use is as below:-
<i class="fa fa-2x fa-fw "></i>
As you can see in the above snippet, this is the way fontawesome classes defined in the <em>.css</em> file.
Class fa is defined as below:-
.fa {
  display: inline-block;
  font-family: FontAwesome;
  font-style: normal;
  font-weight: normal;
  line-height: 1;
  -webkit-font-smoothing: antialiased;
  -moz-osx-font-smoothing: grayscale;
}
fa-fw is defined as below:
.fa-fw {
  width: 1.28571429em;
  text-align: center;
}
These are the definition of the classes defined in the css. You think I have missed fa-2x, ok Guys there are fa-1x, fa-3x and more as they represent the font-size simplified as <em>1em, 2em, 3em & similarly..</em>
Then the actual class for the icon is to be used along with these which define its characteristics. The class name is prefixed with “fa-“. The many icons along with the classes that can be used are given in the link/cheatsheet:-Font Awesome Cheatsheet
You find a lots of icons with their class name to be used. Just specify the name as below and see the icon onscreen. Even another fact is we can even change the color of the icon as we want, using the similar color css property.
<i class="fa fa-2x fa-fw fa-adjust"></i>
Conclusion
This is how this awesome Font Awesome can be used so simply in our projects. Thus reducing the time & size for the page being loaded. So start using this beautiful, light-weight and authentic library for the icons to be used.
References
]]>- Introduction to Razor
- Why Razor?
- Difference Between Razor & ASPX
- Step by Step approach towards use of Razor
Introduction to Razor
Razor is the name of the view engine that was introduced by Microsoft in MVC3. A view engine processes ASP.NET content & looks for instructions, typically to insert dynamic content into the output sent to the browser. There are two types of view engines used in ASP.NET, ASPX engine works on the <% and %> tags that has been the mainstay of ASP.NET development and the Razor engine that works on regions of content denoted within the @ symbol/character. The other view engines used are SPARK & NHaml. You can get to know about customizing the view engines and what it’s purpose is here: ^Customized View Engines
Razor is not a programming language but a server side markup language. The Razor view engine is optimized around HTML generation using a code focused templating approach. Razor supports both the languages C# and VB.
Syntax Rules for C#
- Razor code blocks are enclosed within @(..)
- Inline expressions like variables and the methods service calls are prepended with “@”
- Statements within the @(..)are the code statements and end with semicolon(;)
- Variables as normal are declared using the
varkeyword - C# codes are case sensitive
- These have the extension .cshtml
Syntax Rules for VB
- Razor code blocks here are enclosed using @Code … End Code
- Inline expressions like variables and the methods service calls are prepended with “@”
- Variables are declared using DIM keyword
- VB codes are not case sensitive
- They have extension .vbhtml
Why Razor ?
Now the question arises Why Razor!! Ok let’s now discuss the major advantages of Razor or the optimizations which the Microsoft developers thought of overcoming using Razor.. Advantages(straight from ScottGu):-Compact, Expressive & Fluid:
The number of characters and keywords are minimized that enables a fast, fluid code writing. Unlike most template syntaxes, you do not need to stop your coding to explicitly mention server blocks within the HTML. The parser is smart enough to get this from the code. This make really compact and expressive code which is clean & fast to type.
Has great Intellisence
The intellisence provided make the job more easier and the code completion statements more smooth.
Unit Testing Compatibility
This has the ability to unit test the view page without the involvement of the controllers or web server & also can be hosted in any unit test project.
Difference Between Razor & ASPX
- Razor Engine is an advanced view engine that got its name with MVC3. This is not a new language but is a new markup syntax. where as Web Form Engine is the default view engine for the ASP.NET MVC that is included with ASP.NET MVC from the beginning.
- The namespace for Razor Engine is
System.Web.Razorwhereas namespace for Webform Engine isSystem.Web.Mvc.WebFormViewEngine. - The extensions for this type is .cshtml or .vbhtml whereas the extension for ASPX is .aspx
- The syntax goes as below:
Razor- @Html.ActionLink("","")whereas ASPX-<% Html.ActionLink("", "")%> - As mentioned above, Razor supports Unit testing and to be specific TDD (Test Driven Development) where as ASPX does not support TDD.
Step by Step Approach Towards Use of Razor
We have to go into the coding now. We will discuss step by step the implementation and use of Razor. We will create a new MVC project in Visual Studio and then move forward.
Step 1
Create a new Project in Visual Studio. Follow the below steps to get a broader view of creating a new MVC project.
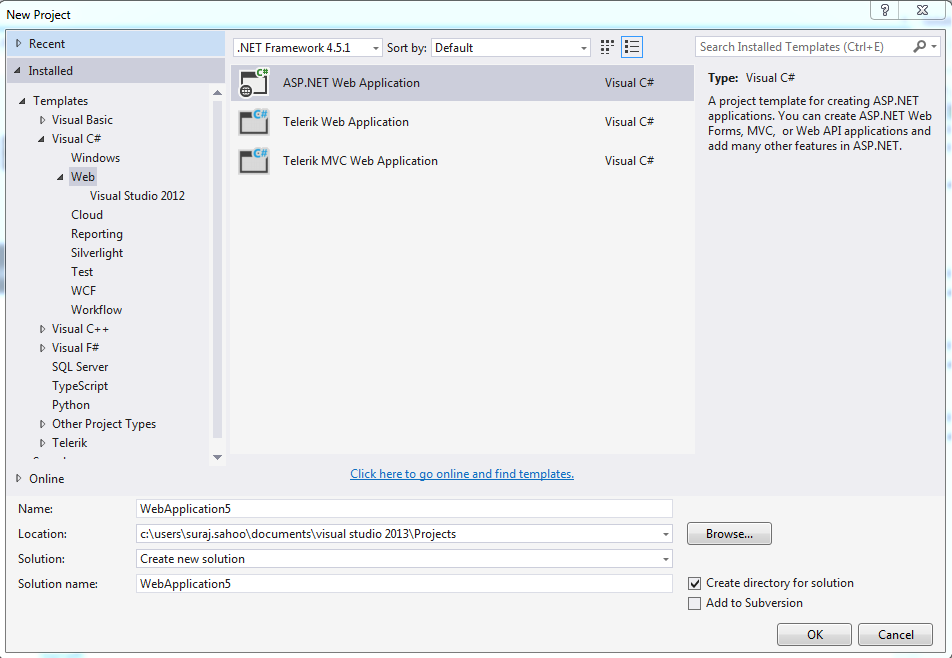
In the above image, we can see when a new project is opted in Visual Studio, this modal pops up asking the user that is us to select which type of project we want to develop. Here, we would like to create an ASP.NET Web Project. So, we have chosen that and give a name to the Project.
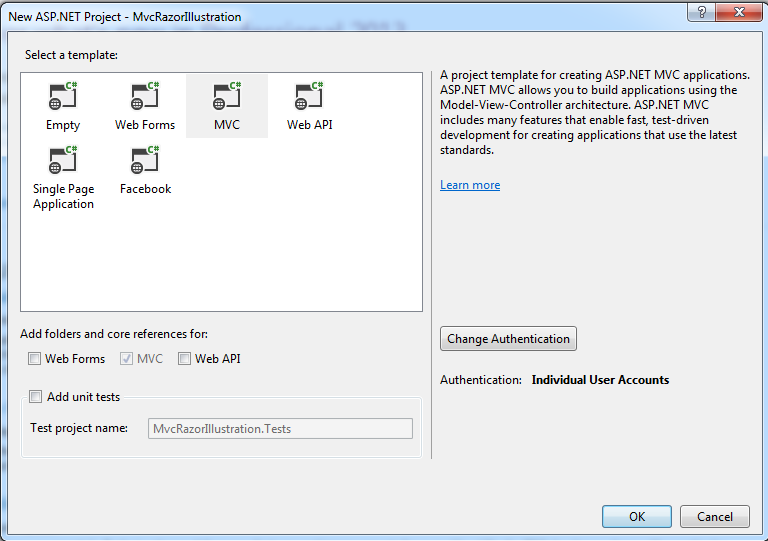
The above image is the pop up that opens up after the ASP.NET project is selected. This asks whether we need a Web API, MVC, Web Form. MVC is by default selected and we need that here.  On click of OK, Visual Studio is smart enough to create the project base with the basic MVC architecture. The structure is the below image:

Here, you can see the folders the Visual Studio creates for a new project. You can get a broader idea on MVC architecture and the flow in link: ^MVC Architecture.
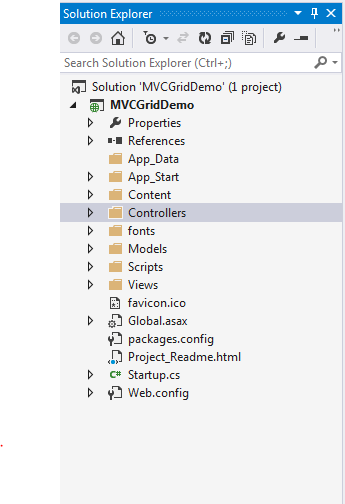
Defining a Model
Model: This layer represents the core of an application. It is responsible for maintaining the data of the application or can be termed to be the Business layer. As you can see in the project folder structure in the Visual Studio, there is a Models folder. This folder contains the classes & Entities to be used in the project. By default, Visual Studio 2013 for MVC 5 provides two classes in this folder, that is: AccountViewModel.cs & IdentityModel.cs. To start with, we first add a model class to the Model folder. Let’s add a class called EmployeeDemoViewModel.csand the class looks as the below snippet:
namespace MvcRazorIllustration.Models
{
    public class EmployeeDemoViewModel
    {
        [Required(ErrorMessage = "This information is required.")]
        [StringLength(50, ErrorMessage = " ")]
        [Display(Name = "Employee Name")]
        public string EmployeeName { get; set; }
        public string EmployeeEmail { get; set; }

        [Required(ErrorMessage = "This information is required.")]
        [StringLength(50, ErrorMessage = " ")]
        [Display(Name = "Employee Address")]
        public string EmployeeAdress { get; set; }
        public string PhoneNo { get; set; }
    }
}
The above properties have been added after adding the class. Our next task is to add a controller. Let’s look below.
Defining a Controller
Controller handles the input to the database or vice-versa that is to fetch data from the database records. This can be simply termed as Input layer. In this demo, we will add our custom code blocks to the default Action methods provided by the Visual Studio, using an Internet template. I will be using custom static values, not retrieving from the database, as this I would be covering when I will write about Entity Framework. So thus theIndex() action method was the prey here for me in the Home Controller.The code snippet goes below:
using System.Web.Mvc;
using MvcRazorIllustration.Models;

namespace MvcRazorIllustration.Controllers
{
    public class HomeController : Controller
    {
        public ActionResult Index()
        {
         //Creating the new instance of the viewmodel and assigning custom values not dynamic
            var viewModel = new EmployeeDemoViewModel
            {
                EmployeeName = "Suraj Sahoo",
                EmployeeEmail = "[email protected]",
                EmployeeAdress = "Madhupatana",
                PhoneNo = "8270669104"
            };
            return View(viewModel);//Returning the view with the viewmodel properties that will be accessed in the view.
        }

        public ActionResult About()
        {
            ViewBag.Message = "Your application description page.";

            return View();
        }

        public ActionResult Contact()
        {
            ViewBag.Message = "Your contact page.";

            return View();
        }
    }
}
Now we have the viewmodel assigned values. We need to bind these values in the Index Viewpage, i.e.,Index.cshtml/Index.vbhtml. Now let’s look below at the View snippet.
Defining a View
In the view page is where the role of Razor comes into play. Here we use the Model and access the values using Razor syntaxes to retrieve the values or fetch the values may it be from database, but we can call fetch from Server side. The code snippet goes below:
@model MvcRazorIllustration.Models.EmployeeDemoViewModel

@{
    ViewBag.Title = "Home Page";
}

    <div><span class="text-danger h2">@Model.EmployeeName</span><br />
    <span class="text-danger h2">@Model.EmployeeAdress</span><br />
    <span class="text-danger h2">@Model.EmployeeEmail</span><br />
    <span class="text-danger h2">@Model.PhoneNo</span></div>
As you can see, the lines of code and how good is the Razor!! This serves a purpose. We have in the snippet declared the use of the specific model to be used to fetch the values & as we have mentioned earlier, the Razor syntax prepends the fetching values code with “@“.
After the code block gets executed, the magic is seen.
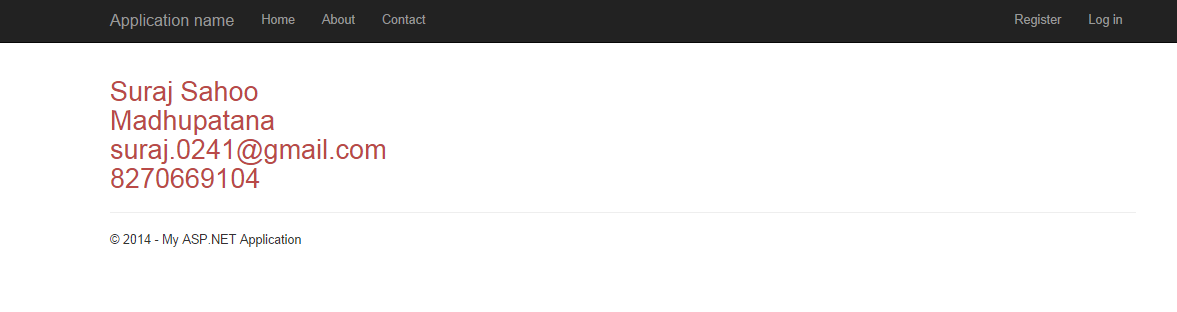
As we can see here, the static or custom values we had assigned to the model properties are reflecting in the view by the use of Razor syntax. Similarly, even if we fetch the values from the database, the code syntax for the Razor in the view page remains the same. The best part is we can use if else, foreach statements using the Razor inside a viewpage also. Let’s look at how:
//if else condition
@if(){
   //do anything
   ....
   }
else{
   //do something
   ....
    }

//foreach condition
@foreach(var view in viewModel)
{

   @view.Propertyname1
   @view.Propertyname2

}

//for loop
@for(var i=0;i<10;i++){
    Line No. @i
    }

//switch case
@switch(bakeryItem)
{
    case "Cake":
    message="This is the Vanilla.";
    break;
    case "Pastries":
    message="This is butterscotch.";
    break;
    default: message="This is strawberry";
    break;
}
Using Razor to request for another action method, the syntax goes as below:
@Html.RenderAction("","")
@Html.ActionLink("Action Link to be shown","Action Name","Controller Name")
This is how convenient and expressive and optimized Razor is.
HTML Form Elements Use
Here, let’s discuss about the use of form elements using Razor: Suppose we want the model property to be shown inside a textbox. So we write:
@Html.TextBoxFor(m=>m.EmployeeName) //This prints just the name inside a textbox

@Html.TextBoxFor(m=>m.EmployeeName, new{@class="input-lg",
@id="ANY NAME"}) //This is adding a class to the Textbox as well as an Id.

@Html.TextBoxFor(m=>m.EmployeeName,
new{@style="color:red;"})//This is adding styles to the Textbox or any form elements.
As we saw above, we applied Razor only to Textbox, we could also apply for:
@Html.Label("Employee")//Html.Label gives you a label for an input
            //whose name matches the specified input text (more specifically,
            //for the model property matching the string expression)

@Html.LabeFor(m=>m.EmployeeAddress)// gives you a label for the property
        //represented by the provided expression (a model property)
As mentioned above, @Html.Label is similar to <label for="Employee">Employee</label>, just prints the name provided to be a label. whereas @Html.LabelFor(m=>m.EmployeeAddress) is similar to <label for="EmployeeAddress">@Model.EmployeeAddress</label>.
Let’s create a form to be submitted suppose using Razor syntax:
@using (Html.BeginForm("ACTION", "CONTROLLER",
    FormMethod.Post, new { id = "frmDemo", @class = "form-horizontal container-fluid" }))
     {
       @Html.HiddenFor(m => m.EmployeeID, new { @id = "txtEmployeeID"})

    <div class="control-group">@Html.LabelFor(m=>m.EmployeeName)
    <div class="controls">@Html.TextBoxFor(m=>m.EmployeeName,
    new{@class="input-lg"}) @Html.ValidationMessageFor
    (m=>m.EmployeeName)// Validation message provided with the data annotation attribute in the model</div>
    </div>

    <div class="control-group">@Html.LabelFor
    (m=>m.EmployeeName)//if data annotation attributeDisplayName is used.
    <div class="controls">@Html.TextBoxFor(m=>m.EmployeeAddress)
    @Html.ValidationMessageFor(m=>m.EmployeeAddress)</div>
    </div>
    <input class="btn btn-primary" type="button"
    value="Submit" /> } @Html.HiddenFor(m=>m.EmployeeID),
    this is a nice thing to be used in a form, because this value is hidden that means,
    the field will not be seen to the end user but can be used in the post method.
    This is the magic of Razor using the @Html.BeginForm
    we can call Post method directly onclick of the submit button.
Points of Interest
Escape Character
To escape the “@” character using Razor, we prepend two “@@” to another @. Like below:
@@@CodeIn
@@CodeIn
suraj sahoo
The first one would write @C# Second one would write @@CodeIn and third one would write suraj sahoo. This is the Razor Parser that is smart enough to know and read the @ symbol and how to render and write the values.
Raw in Razor
Another importance of the Razor is suppose we are using any Text editor as here in CodeProject is using, the source code is stored into the database and when the article is published, the source code or the HTML codes are decoded or unencoded to display the beautified version of the source which the user had written. This is simply rendered at the server into the viewmodel property and then accessed in the View page:
@Html.Raw(@Model.TextEditorText)
To declare any variable globally or use the layout in a viewpage, the Razor syntax provides an easier way to code them like:
@{
    Layout="~/Views/Shared/Layout.cshtml";
    var url = "www.google.com";
}

 Click here to go to <a href="@url" target="_blank">Google
Comments in Razor
Commenting in Razor goes as below:
@*.......//Comments ... *@
Render Sections
RenderSection() is a method from System.Web.WebPages namespace & the WebPageBase class. To be exact, RenderSection() method is of two types, i.e., same method but with different parameters.
They are:
RenderSection(string): This method just renders the contents of a named section in the layout Pages, as simple as this could be (the definition ).RenderSection(string, Boolean): This renders the named section similar to the previous method, but also specifies whether the section is required. This method with an extra parameter does a great bit of work, which we will discuss below.
Why is this required by the way!!
As we know, something to explain has a better way of understanding if explained through an example. So, let’s take one.
Suppose we are designing an application that has three pages. The “Home”, “About”, “Topics” pages and obviously all the pages have different content.
Now, we have a small sidebar on all the three pages and the content for Home and About pages are same that is the contacts of the Admin, & the Topics page has the contact replaced by a cloud structure displaying all the Tags for the articles/topics.
As we would know by now that these three pages will use the same layout and the sidebar would be displayed at the same place for the pages. Here is where the Render Section method comes into play.
In the layout.cshtml(C# Razor), wherever we need the sidebar section to be rendered, we write as@RenderSection("Section Name").
And in the individual pages those use the Layout, we define the section there as , @section “Section Name(remove the quotes)”{…..}. Wherever and whatever the contents might be just define it and render once in the Layout. This simplifies the work of writing the HTML codes and the css also..
This sounds so simple, until you have only three pages. Give a thought, is this possible always!! No. In a web application, there might be many pages using the layout. Here is what an important point about Render Section comes, which we should keep in mind before using.
“Every Page that uses the Layout, and the layout.cshtml has a RenderSection(), that page needs to have the section with that name defined”. Else this also throws the user to the yellow screen of death (depending on the Custom Errors mode) or nothing a blank pageas whole parts of a page are not yet rendered. The exact exception is:
"System.Web.Exception: Section not defined:"SECTION NAME"."
Just give a thought if there are many pages, where would you search for, where you have missed to define the section. This is not a feasible solution right?
So, it is better to use the second method, i.e. RenderSection(string, Boolean).
If we use the RenderSection("SECTION NAME", required:false), what this means is, if a section is required and is not defined in the page and the section is optional in some page, then by the use of this method the RenderSection() method will render nothing and no runtime error would occur.
If we use the RenderSection("SECTION NAME", required:true), then we need to define the section in each page as we are prescribing here that section needs to be rendered on each page using the layout. We can also define a blank section to avoid the runtime error.
Using Conditional Detection for presence of a section.
We can also use another small piece of code to avoid the runtime error and detect that the section is defined or not. Here goes the code:
@if(IsSectionDefined("SECTION NAME")) {

      @RenderSection("SECTION NAME")

         }
else {

      .....

         }
We could also define a specific section and reuse it in other view pages. Let’s see the snippet for creating a section:
@section DemoSection{
    //section code goes here
}

@RenderSection("DemoSection",false)
Render Body method is used in the Layout page to render the body sections of the view page that use Layout. In the Layout page:
<div id="head">//Head section goes here..</div>

    <div id="body">@RenderBody()</div>
We could also RenderPage with:
@RenderPage("~/Views/Shared/_DemoPage.cshtml")We could also send some data using View Bag from the server side method in order to save database transactions.
@ViewBag.Message
I am penning this article for those who are new to MVC and would like to take this as their future in Software industry. I have tried to explain this in as simple a manner as I could. Hope the beginners get some value to learn from this.
]]>Lets Get Started
Pre-Requisites:
Before getting started, we need to know what is MVC. As we would be dealing everything with MVC components.
![]()
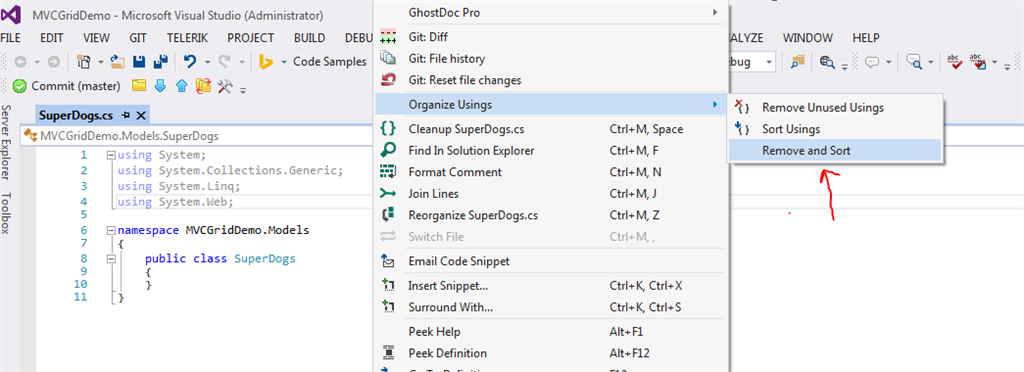
In the above image as you can see, I have red arrowed towards an option called Remove & Sort. What this does is, when we add a class the using statements are added automatically even if they are not being used. So to maintain the consistency lets remove them. And we can remove them by right clicking on the class file and click on the above nested route i.e. Remove & Sort and finally our class SuperDog.cs would look like:-
-
namespace MVCGridDemo.Models
{
    public class SuperDogs
    {
        public string DogName { get; set; }
        public string BreedName { get; set; }
        public int DogAge { get; set; }
        public string DogOwner { get; set; }
    }
}
This is the class we have added after removing or sorting the Usings statements.
Step 4:
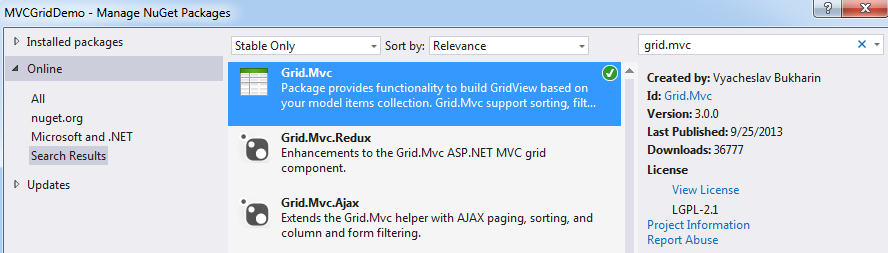
We should also search for the Bootstrap online and istall that too.
Step 5:
-
/// <summary>
       /// This returns the hard code values required for setting the grid
       /// </summary>
       /// <returns></returns>
       public List<SuperDogs> GetHardCodedValues()
       {
           var returnModel = new List<SuperDogs>();

           var firstDog = new SuperDogs
           {
               BreedName = "Labrador",
               DogAge = 1,
               DogName = "HACHIKO",
               DogOwner = "SURAJ SAHOO",

           };

           var secondDog = new SuperDogs
           {
               BreedName = "Labrador",
               DogAge = 2,
               DogName = "STEFFY",
               DogOwner = "XYZ",
           };
           var thirdDog = new SuperDogs
           {
               BreedName = "Golden Retriever",
               DogAge = 3,
               DogName = "LOVELY",
               DogOwner = "PQrS",
           };
           var forthDog = new SuperDogs
           {
               BreedName = "German Spitz",
               DogAge = 5,
               DogName = "CANDY",
               DogOwner = "ABCD",
           };
           var fifthDog = new SuperDogs
           {
               BreedName = "German Sheperd",
               DogAge = 10,
               DogName = "CAPTAIN",
               DogOwner = "Mota",
           };
           var sixthDog = new SuperDogs
           {
               BreedName = "British BullDog",
               DogAge = 10,
               DogName = "BILL",
               DogOwner = "AUTA",
           };
           for (var i = 0; i < 10; i++)
           {
               returnModel.Add(firstDog);
               returnModel.Add(secondDog);
               returnModel.Add(thirdDog);
               returnModel.Add(forthDog);
               returnModel.Add(fifthDog);
               returnModel.Add(sixthDog);
           }
           return returnModel;
       }
The above piece of code is added inside the model class SuperDog.cs only.
Step 6:
Now lets discuss the codes inside the Action method.
The first line is the instantiation of the model class which we have added. This we are instantiating as we need to access the collection of data objects which we have created inside method GetHardCodedvalues().
- @model IEnumerable<MVCGridDemo.Models.SuperDogs>
This is the model used in the view.
Now its time to add the Grid code block into our view. The MVC Grid is used using
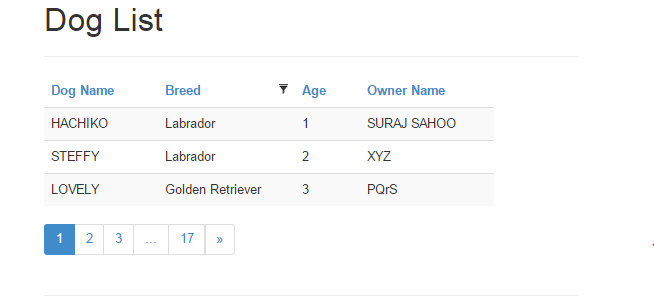
Finally the view with the html mvc Grid looks like below:
-
@using GridMvc.Html
@model IEnumerable<MVCGridDemo.Models.SuperDogs>

@{
    ViewBag.Title = "Index";
}
<html>
<head>
    <meta name="viewport" content="width=device-width" />
    <link href="@Url.Content("~/Content/Gridmvc.css")" rel="stylesheet" />
    <link href="@Url.Content("~/Content/bootstrap.min.css")" rel="stylesheet" />
    <script src="@Url.Content("~/Scripts/gridmvc.min.js")"></script>
    <title>Dog List</title>
</head>
<body>
    <h1>Dog List</h1>
    <hr />
    <div style="width:500px;">
        @Html.Grid(Model).Columns(columns =>
                    {
                        columns.Add(c => c.DogName).Titled("Dog Name");
                        columns.Add(c => c.BreedName).Titled("Breed").Filterable(true);
                        columns.Add(c => c.DogAge).Titled("Age");
                        columns.Add(c => c.DogOwner).Titled("Owner Name");
                    }).WithPaging(3).Sortable(true)
    </div>
</body>
</html>
The functionalities like Sortable() accepting a boolean value WithPaging() the value parameter suggests the number of records in the grid & the Titled() is used to add the title of the respective column. You can also see the reference for the StyleSheets(.css) & Scripts(.js) for the gridmvc and bootstrap too. Finally when we run the application using the url : “/SuperDog/Index” we get the below result:
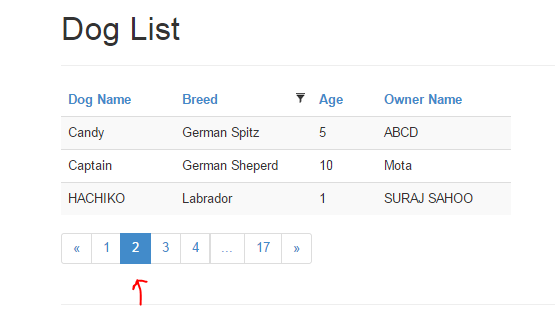
In the next article or part 2 I will show how to create a record and dynamically get the records from the database and bind the Grid.
I hope this would help in creating the grid. You can also download the source code file.
Topics to be covered
- What is HTML5
- Semantic Markup
- Forms
- Audio & Video
- Data Storage
- What is CSS
- Inheritance & Cascading
- Style Sheets
- Page Layout & Nav bars
- Web Matrix & Demo
What is HTML5?
HTML5 is the 5th version of HTML. Now wonder what is HTML!!
HYPER TEXT MARKUP LANGUAGE. Caps means I am shouting, but it is a shout that needs to be done. Lets understand each word of it.
Hyper as we all know means to get exaggareted or tempered on something. Here it also has a similar meaning, when taken together with
Hyper Text. This means it gives a simple text a hyper meaning. For instance, a simple text video written changes to a iframe where a video is played when rendered on a browser.
HTML is used to create web pages in web applications. WebPages!! In a simple way, a page that gets rendered on web is called web page.
Let get some brief on the history also.  . Though the sadpart but lets get into it a bit.

The above image says it all. But I would like to brief something interesting here. HTML4 was to be suppressed by XHTML but W3C(World Wide Web Consortium) never got heavily biased by XHTML.
HTML5 was being secretly developed by WHATG group. HTML5 is a combination of number of technologies and techniques and approaches to web. Thus the HTML5 was so convincing that it was approved by the W3C recently.
Semantic Markup
First lets know what is semantic! Semantic in dictionary means it is related to meaning in language and logic. That means what logic/idea you get you derive text out of it and HTML5 gives you the desired output. Like for instance,
You think of a logic where you want user to show the amount of download/upload done or progressed. So here we derive the word progress, and HTML5 gives the tag element
Doctype html simplified
<!Doctype html> has been simplified prior to the previously used has been replaced. Just for information, the syntax is case-insensitive.
The image shows, the html starts with the doctype that lets the web browser know that the document being loaded is of type “html”.
Then is thethat states that the html doc is written in english language.
Forms in HTML
HTML Forms are required when you want to collect some data from the site visitor. For example during user registration you would like to collect information such as name, email address, credit card, etc. A form takes the input from the user and stores them
in the server.
Different attributes are:-
- Action:- Backend/Server side code for storing the records.
- Method:- GET/POST, suggests whether to post data/input or get the data input into the form elements.
- Target:- Specify the window/frame where the end result script will be shown, _blank,_self,_parent.
We will see the example in the demo codes.
Audio & Video
In HTML5, there is no need anymore to use the iframes and load the videos/audios. The HTML5 audio and video tags make simple to add media files to website. We just need to set src attribute to let the frame know which video or audio to play, and also set the other attribute
like loop which plays the media file continously, autoplay lets the media file play when the page loads, controls let the controls icons to view on the frame and height width.
Data Storage
This is a very new concept that has been introduced in HTML5 that helps store data incase there is slow connection. Thus this introduces a balance between server side and the client side processing. This is an extension to cookies.
There are two types of data storage schemes,
- Session Storage
- Local Storage
Local Storage
Before HTML5 was introduced, data was stored in cookies and code was maintained on the server only. But now in HTML5, local storage is introduced where data can be stored in large bulk, without affecting the performance of the website. Unlike the cookies, the storage limit is 5MB.
The Local storage is based on the domain. All pages can access the stored data those are from the same domain as the data gets stored locally.
window.localStorage: (stores without expiration time)
function initiate(){
    var saveButton = document.getElementById("save");
    var retrieveButton = document.getElementById("retrieve");
    var deleteBUtton = document.getElementById("delete");
    saveButton.addEventListener('click', saveItem);
    retrieveButton.addEventListener('click', retrieveItem);
    deleteBUtton.addEventListener('click', deleteItem);
}

function saveItem(){
    var firstName = document.getElementById("fName").value;
    var lastname = document.getElementById("lName").value;
    var email = document.getElementById("eMail").value;
    var address = document.getElementById("add").value;
    var comments = document.getElementById("comments").value;
    localStorage[firstName] = address;
    document.getElementById("fName").value = "";
}

function retrieveItem(){
    var data = document.getElementById("retrieveData");
    var firstName = document.getElementById("fName").value;
    var add = localStorage[firstName];
    data.innerHTML =  add;
}
function deleteItem(){
    if (confirm('Delete?')) {
        var firstName = document.getElementById("fName").value;
        localStorage.removeItem(firstName);
        alert("Deleted");
        document.getElementById("retrieveData").value = '';
    }
}
addEventListener("load", initiate);
Session Storage
Before HTML5 was introduced, data was stored in cookies and code was maintained on the server only. But now in HTML5, session storage is introduced where data can be stored, without affecting the performance of the website. Unlike the Local Storage, in the session storage, the data
gets stored in session and also depends on the session. Once the session expires, the data is lost. But this not the case in the local storage the data persists without time limit, where as in the session storage the data is lost once the session expires or the browser is closed.
window.sessionStorage:-(stores with session expire time)
function initiate(){
    var saveButton = document.getElementById("save");
    var retrieveButton = document.getElementById("retrieve");
    var deleteBUtton = document.getElementById("delete");
    saveButton.addEventListener('click', saveItem);
    retrieveButton.addEventListener('click', retrieveItem);
    deleteBUtton.addEventListener('click', deleteItem);
}

function saveItem(){
    var firstName = document.getElementById("fName").value;
    var lastname = document.getElementById("lName").value;
    var email = document.getElementById("eMail").value;
    var address = document.getElementById("add").value;
    var comments = document.getElementById("comments").value;
    sessionStorage[firstName] = address;
    document.getElementById("fName").value = "";
}

function retrieveItem(){
    var data = document.getElementById("retrieveData");
    var firstName = document.getElementById("fName").value;
    var add = sessionStorage[firstName];
    data.innerHTML =  add;
}
function deleteItem(){
    if (confirm('Delete?')) {
        var firstName = document.getElementById("fName").value;
        sessionStorage.removeItem(firstName);
        alert("Deleted");
        document.getElementById("retrieveData").value = '';
    }
}
addEventListener("load", initiate);
Here we end discussing on the HTML5, now lets move onto the CSS
What is CSS
CSS- Cascading Style Sheet. Lets discuss the definition word by word.
“Cascading” in this context means that because more than one stylesheet rule could apply to a particular piece of HTML, there has to be a known way of determining which specific stylesheet rule applies to which piece of HTML.
Style sheet as it explains itself is a sheet where styles are specified for the HTML elements on the pages. Descendents inherit style from ancestors. More Specific styles win over the inherited style.
Identifiers, Class & Pseudo Elements
Identifiers are represented in an element as id=”IDENTIFIER NAME”. These are the unique peices that can only be attached/added to a specific element. These are accessed through the character “#”.
Classes are represented in an element as class=”CLASS NAME”. These are the peices that are defined once in the Style sheet and can be used in multiple elements. These are accessed through the charachter “.”(dot).
Pseudo elements are :first-child
:last-child
:nth-child(odd/even)
These elements are predefined and are accompanied or they succeed the letters of the html tag elements, like:-
Specificity Rule
A very nice concept to know for using CSS in an effective manner. Lets look into the concept.
Id : a ex:- ul ol li .red
Class: b a = 0; b=1; c=3 => sp = 013
Pseudo Elements: c
As you can see in the above example, we can see ID has the highest specificity. see in the example i.e. ul ol li .red, there is one class so b=1, pseudo elements are 3, so c=3. Thus the specificity turns out to be 013.
Taking another example, ul #listID .redList, here the specificity turns out to be a=1;b=1;c=1 so 111.
Page Layout
- Layout contain boxes, that is block-level elements
- Use HTML Semantic tags
- Else if Semantic tag don’t work, use
- For making a column: set width
set float - For Layout, start with content & Identify boxes.
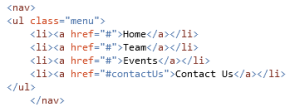
- Is a set of links
- List of different areas/pages using
- Remove the bullets {list-style:none}
- Eliminate padding & margins
- Set display to inline-block to eliminate new lines
- Style the links (as you wish)
Nav Bars
WebMatrix
This is a very light weight, opensource tool provided by Microsoft that can be downloaded from the link below:-
For Web Matrix
Web Matrix can be downloaded also from the Microsoft Web Platform Installer from the below link:-
For Web Platform Installer
Finally the demo codes will look like below when run on browser:-
