Still using images for icons!! Now in every other web site/web pages, we find intensive use of icons to help user navigate and understand easily the whole purpose. Making the icons simple and understandable from user point of view is what the motive stands here. But using images for icons!! would that be fine!!Would not that affect the page performance as the image has some size right readers!!Let me introduce here to you a small package upgraded and light-weight and easy to use which makes the GUI so simple to implement. Lets get started..
Getting Started With Font-awesome
As the name itself suggests, this package is awesome. From a github post,
Font Awesome is a full suite of 519 pictographic icons for easy scalable vector graphics on websites, created and maintained by Dave Gandy.
These are simple text, which can easily be manipulated like normal texts using the fonts. You stretch or enlarge an image(.png) icon it gets blurred, it looks bad in simple language. You enlarge any font from the package of fontawesome it would never get blurred or pixalated. Moreover no width no height is required as used in image as attributes, just increase the font-size, it manipulates the icon.
The best thing is this package can be downloaded from the Nuget Package or the Package manager console too. The below image will show how to install the package from the PM Console.
As you can see in the above Image, you need to get to the PM Console window and hit the yellowed Install command.
Install-Package font-awesome -Version 4.1.0
After Installing you may face some error for the assembly package. That is the dependencies on this library and their version may cause some issue here. As for example which I have encountered while adding in my project was the assembly Web.Optimization as this version of this library require varsion 1.1.3. . If any package upgradation/update is required as its dependencies then without any hesitation just update the packages. Infact, the updates for the packages should be checked and updated regularly. After adding the following files/folders get added to the web project.
When added/installed two css files are added for the font-awesome. To a shock,both the files are same, now wonder why then both??Because a small difference between both matters a lot: .min.css is the minified version of the css file that is small light and good for performance. So, while adding the reference in the layout, minified version is preferred/made mandate actually.
The other thing that gets added is shown in the above image.
Lets get some information about the extensions of the files inside the folder. Information are from WIKI:

.eot :- Embedded Open Type fonts are a compact form of OpenType fonts designed by Microsoft for use as embedded fonts on web pages.
.svg :- This is common and known, but still, Scalable Vector Graphics (SVG) is an XML-based vector image format for two-dimensional graphics with support for interactivity and animation.
.ttf :- This is developed by Apple, stands for True Type font. This means the font can be scaled to any font size even without tampering the quality.
.woff :- Stands for Web Open Font Format. This is a font format to be used in the pages rendered on web, that is Webpage.
.otf :- Stands for Open Type Font
This was all about the extensions of the files in the folder.
Usage
To use this as I have already mentioned, we need to have the minified version of the .css file in the layout itself, as the icons would be used intensively. The reference goes as below:
<link href="~/Content/font-awesome.min.css" rel="stylesheet" />
Now to use the class out of the .css defined classes, the use is as below:-
<i class="fa fa-2x fa-fw "></i>
As you can see in the above snippet, this is the way fontawesome classes defined in the <em>.css</em> file.
Class fa is defined as below:-
.fa {
  display: inline-block;
  font-family: FontAwesome;
  font-style: normal;
  font-weight: normal;
  line-height: 1;
  -webkit-font-smoothing: antialiased;
  -moz-osx-font-smoothing: grayscale;
}
fa-fw is defined as below:
.fa-fw {
  width: 1.28571429em;
  text-align: center;
}
These are the definition of the classes defined in the css. You think I have missed fa-2x, ok Guys there are fa-1x, fa-3x and more as they represent the font-size simplified as <em>1em, 2em, 3em & similarly..</em>
Then the actual class for the icon is to be used along with these which define its characteristics. The class name is prefixed with “fa-“. The many icons along with the classes that can be used are given in the link/cheatsheet:-Font Awesome Cheatsheet
You find a lots of icons with their class name to be used. Just specify the name as below and see the icon onscreen. Even another fact is we can even change the color of the icon as we want, using the similar color css property.
<i class="fa fa-2x fa-fw fa-adjust"></i>
Conclusion
This is how this awesome Font Awesome can be used so simply in our projects. Thus reducing the time & size for the page being loaded. So start using this beautiful, light-weight and authentic library for the icons to be used.
References
]]>Topics to be covered
- What is HTML5
- Semantic Markup
- Forms
- Audio & Video
- Data Storage
- What is CSS
- Inheritance & Cascading
- Style Sheets
- Page Layout & Nav bars
- Web Matrix & Demo
What is HTML5?
HTML5 is the 5th version of HTML. Now wonder what is HTML!!
HYPER TEXT MARKUP LANGUAGE. Caps means I am shouting, but it is a shout that needs to be done. Lets understand each word of it.
Hyper as we all know means to get exaggareted or tempered on something. Here it also has a similar meaning, when taken together with
Hyper Text. This means it gives a simple text a hyper meaning. For instance, a simple text video written changes to a iframe where a video is played when rendered on a browser.
HTML is used to create web pages in web applications. WebPages!! In a simple way, a page that gets rendered on web is called web page.
Let get some brief on the history also.  . Though the sadpart but lets get into it a bit.

The above image says it all. But I would like to brief something interesting here. HTML4 was to be suppressed by XHTML but W3C(World Wide Web Consortium) never got heavily biased by XHTML.
HTML5 was being secretly developed by WHATG group. HTML5 is a combination of number of technologies and techniques and approaches to web. Thus the HTML5 was so convincing that it was approved by the W3C recently.
Semantic Markup
First lets know what is semantic! Semantic in dictionary means it is related to meaning in language and logic. That means what logic/idea you get you derive text out of it and HTML5 gives you the desired output. Like for instance,
You think of a logic where you want user to show the amount of download/upload done or progressed. So here we derive the word progress, and HTML5 gives the tag element
Doctype html simplified
<!Doctype html> has been simplified prior to the previously used has been replaced. Just for information, the syntax is case-insensitive.
The image shows, the html starts with the doctype that lets the web browser know that the document being loaded is of type “html”.
Then is thethat states that the html doc is written in english language.
Forms in HTML
HTML Forms are required when you want to collect some data from the site visitor. For example during user registration you would like to collect information such as name, email address, credit card, etc. A form takes the input from the user and stores them
in the server.
Different attributes are:-
- Action:- Backend/Server side code for storing the records.
- Method:- GET/POST, suggests whether to post data/input or get the data input into the form elements.
- Target:- Specify the window/frame where the end result script will be shown, _blank,_self,_parent.
We will see the example in the demo codes.
Audio & Video
In HTML5, there is no need anymore to use the iframes and load the videos/audios. The HTML5 audio and video tags make simple to add media files to website. We just need to set src attribute to let the frame know which video or audio to play, and also set the other attribute
like loop which plays the media file continously, autoplay lets the media file play when the page loads, controls let the controls icons to view on the frame and height width.
Data Storage
This is a very new concept that has been introduced in HTML5 that helps store data incase there is slow connection. Thus this introduces a balance between server side and the client side processing. This is an extension to cookies.
There are two types of data storage schemes,
- Session Storage
- Local Storage
Local Storage
Before HTML5 was introduced, data was stored in cookies and code was maintained on the server only. But now in HTML5, local storage is introduced where data can be stored in large bulk, without affecting the performance of the website. Unlike the cookies, the storage limit is 5MB.
The Local storage is based on the domain. All pages can access the stored data those are from the same domain as the data gets stored locally.
window.localStorage: (stores without expiration time)
function initiate(){
    var saveButton = document.getElementById("save");
    var retrieveButton = document.getElementById("retrieve");
    var deleteBUtton = document.getElementById("delete");
    saveButton.addEventListener('click', saveItem);
    retrieveButton.addEventListener('click', retrieveItem);
    deleteBUtton.addEventListener('click', deleteItem);
}

function saveItem(){
    var firstName = document.getElementById("fName").value;
    var lastname = document.getElementById("lName").value;
    var email = document.getElementById("eMail").value;
    var address = document.getElementById("add").value;
    var comments = document.getElementById("comments").value;
    localStorage[firstName] = address;
    document.getElementById("fName").value = "";
}

function retrieveItem(){
    var data = document.getElementById("retrieveData");
    var firstName = document.getElementById("fName").value;
    var add = localStorage[firstName];
    data.innerHTML =  add;
}
function deleteItem(){
    if (confirm('Delete?')) {
        var firstName = document.getElementById("fName").value;
        localStorage.removeItem(firstName);
        alert("Deleted");
        document.getElementById("retrieveData").value = '';
    }
}
addEventListener("load", initiate);
Session Storage
Before HTML5 was introduced, data was stored in cookies and code was maintained on the server only. But now in HTML5, session storage is introduced where data can be stored, without affecting the performance of the website. Unlike the Local Storage, in the session storage, the data
gets stored in session and also depends on the session. Once the session expires, the data is lost. But this not the case in the local storage the data persists without time limit, where as in the session storage the data is lost once the session expires or the browser is closed.
window.sessionStorage:-(stores with session expire time)
function initiate(){
    var saveButton = document.getElementById("save");
    var retrieveButton = document.getElementById("retrieve");
    var deleteBUtton = document.getElementById("delete");
    saveButton.addEventListener('click', saveItem);
    retrieveButton.addEventListener('click', retrieveItem);
    deleteBUtton.addEventListener('click', deleteItem);
}

function saveItem(){
    var firstName = document.getElementById("fName").value;
    var lastname = document.getElementById("lName").value;
    var email = document.getElementById("eMail").value;
    var address = document.getElementById("add").value;
    var comments = document.getElementById("comments").value;
    sessionStorage[firstName] = address;
    document.getElementById("fName").value = "";
}

function retrieveItem(){
    var data = document.getElementById("retrieveData");
    var firstName = document.getElementById("fName").value;
    var add = sessionStorage[firstName];
    data.innerHTML =  add;
}
function deleteItem(){
    if (confirm('Delete?')) {
        var firstName = document.getElementById("fName").value;
        sessionStorage.removeItem(firstName);
        alert("Deleted");
        document.getElementById("retrieveData").value = '';
    }
}
addEventListener("load", initiate);
Here we end discussing on the HTML5, now lets move onto the CSS
What is CSS
CSS- Cascading Style Sheet. Lets discuss the definition word by word.
“Cascading” in this context means that because more than one stylesheet rule could apply to a particular piece of HTML, there has to be a known way of determining which specific stylesheet rule applies to which piece of HTML.
Style sheet as it explains itself is a sheet where styles are specified for the HTML elements on the pages. Descendents inherit style from ancestors. More Specific styles win over the inherited style.
Identifiers, Class & Pseudo Elements
Identifiers are represented in an element as id=”IDENTIFIER NAME”. These are the unique peices that can only be attached/added to a specific element. These are accessed through the character “#”.
Classes are represented in an element as class=”CLASS NAME”. These are the peices that are defined once in the Style sheet and can be used in multiple elements. These are accessed through the charachter “.”(dot).
Pseudo elements are :first-child
:last-child
:nth-child(odd/even)
These elements are predefined and are accompanied or they succeed the letters of the html tag elements, like:-
Specificity Rule
A very nice concept to know for using CSS in an effective manner. Lets look into the concept.
Id : a ex:- ul ol li .red
Class: b a = 0; b=1; c=3 => sp = 013
Pseudo Elements: c
As you can see in the above example, we can see ID has the highest specificity. see in the example i.e. ul ol li .red, there is one class so b=1, pseudo elements are 3, so c=3. Thus the specificity turns out to be 013.
Taking another example, ul #listID .redList, here the specificity turns out to be a=1;b=1;c=1 so 111.
Page Layout
- Layout contain boxes, that is block-level elements
- Use HTML Semantic tags
- Else if Semantic tag don’t work, use
- For making a column: set width
set float - For Layout, start with content & Identify boxes.
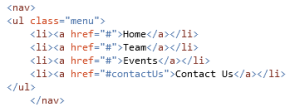
- Is a set of links
- List of different areas/pages using
- Remove the bullets {list-style:none}
- Eliminate padding & margins
- Set display to inline-block to eliminate new lines
- Style the links (as you wish)
Nav Bars
WebMatrix
This is a very light weight, opensource tool provided by Microsoft that can be downloaded from the link below:-
For Web Matrix
Web Matrix can be downloaded also from the Microsoft Web Platform Installer from the below link:-
For Web Platform Installer
Finally the demo codes will look like below when run on browser:-

Windows Azure provides various cloud enabled storage services and Blob storage is one of them. BLOB stands for “Binary Large Object” which means unstructured data that typically includes images, documents, audio, video or other multimedia objects. The main purpose for using BLOB cloud services is it has a many advantages over storing files in local file systems.
As the msdn suggests the advantages are :-
- It is highly Scalable : that is a single storage account(will be discussed ahead) can store hundreds of terabytes of data and one can have multiple storage accounts.
- It is Durable : that is every file(images, documents, audio, video or other) stored, automatically has a backup.
And many more, for the time these are of more focus.
This article mainly focuses on use of cloud services as here is Azure, checking for containers in our development storage and creating blobs dynamically into it and uploading files to it, as its being used in almost every sites.
In order to develop Azure Cloud enabled applications, we need to install SDK(Software Development Kit-A software development tool required to create application for specific software) first. The best way to develop SDK is :
- https://azure.microsoft.com/en-us/downloads/ go to this site and download the Azure SDK for Visual Studio 2013/12.
- Else go to Visual Studio->Select new project->Select Cloud->
It will then redirect you to download the SDK if its not installed.
- After selecting the cloud, select your project as “Windows Azure Cloud Services”. Then add another project to your solution as MVC Web Role from the popup you get after choosing the Azure Cloud Services. Now you have your solution with two projects a Cloud Service and an MVC . **One thing to keep in mind here is the WebRole.cs has an On Start() method that executes before Global.asax.
- Then in the Cloud Service Project (for this blog I have given the name as UploadTrial1), we can find a Roles Folder. In that folder select the MVCWebRole, it redirects you to the configurations of it. Select the settings and Add Settings, with any name and then select Windows Azure Storage Emulator. There are other options like Manually Entered Credentials and Your Subscriptions. These are required during Deployment and selecting Windows Azures Storage Emulator sets UseDevelopmentStorage=true, that means our local storage.
Now lets start our play with MVC, Add a class to it that would create and check for the containers(I have named as BlobStorageServices.cs) and the code goes as mentioned below:-
//namespaces used
using Microsoft.WindowsAzure.ServiceRuntime;
using Microsoft.WindowsAzure.Storage;
using Microsoft.WindowsAzure.Storage.Blob;
using System;
using System.Collections.Generic;
using System.Linq;
using System.Web;
namespace MvcWebRole1
{
//Container information
public class BlobStorageServices
{
public CloudBlobContainer GetCloudBlobContainer()
{
CloudStorageAccount storageAccount = CloudStorageAccount.Parse(RoleEnvironment.GetConfigurationSettingValue("ImageUploadSetting"));//gets settings value
CloudBlobClient blobClient = storageAccount.CreateCloudBlobClient();//activates the storage account on local
CloudBlobContainer blobContainer = blobClient.GetContainerReference("imagesupload");
if(blobContainer.CreateIfNotExists())
{
blobContainer.SetPermissions(new BlobContainerPermissions { PublicAccess = BlobContainerPublicAccessType.Blob });//Allowing public Access

}

return blobContainer;

}

}

}
Now add a action method to your HomeController. I have named the action as Upload[HttpGet]/[HttpPost]. The code goes below:-
BlobStorageServices blobStorageServices = new BlobStorageServices();//Instantiate object of the class we just created for containers.
/// <summary>
/// Uploads this Image.
/// </summary>
/// <returns>Views of blobs</returns>
[HttpGet]
public ActionResult Upload()
{
CloudBlobContainer blobContainer = blobStorageServices.GetCloudBlobContainer();
List<string> blobs=new List<string>();
foreach(var blobItem in blobContainer.ListBlobs())
{
blobs.Add(blobItem.Uri.ToString());//Returns all the blobs Uri in the container.
}
return View(blobs);//Returns to view to display all blobs.

}
/// <summary>
/// Uploads the specified image.
/// </summary>
/// <param name="image">The image.</param>
/// <returns>Redirected to Upload Action</returns>
[HttpPost]
public ActionResult Upload(HttpPostedFileBase image) //Accept the posted file
{
try
{
if (image.ContentLength > 0)
{
CloudBlobContainer blobContainer = blobStorageServices.GetCloudBlobContainer();
CloudBlockBlob blob = blobContainer.GetBlockBlobReference(image.FileName);   //First Blob

// Upload content to the blob, which will create the blob if it does not already exist.
blob.UploadFromStream(image.InputStream);
}
}
catch(Exception ex)  //Catches Null Exception here and stores it to blob
{
CloudBlobContainer blobContainer = blobStorageServices.GetCloudBlobContainer();
CloudBlockBlob blob2 = blobContainer.GetBlockBlobReference("myfile.txt");  //Second Blob
blob2.UploadText(ex.ToString());
}
return RedirectToAction("Upload");
}
Here I have gone for an exception handling and a better way is I am uploading the exception content creating another blob (myfile.txt). Here we upload image and a text file that includes exception, incase it occurs.
Now lets work on the UI part. I am coding a simple UI design and the code goes here:-I have used Razor in MVC4.
@{
ViewBag.Title = "Upload";
}
<h2>Upload Image</h2>
<p>
@using (Html.BeginForm("Upload", "Home", FormMethod.Post, new { enctype = "multipart/form-data" }))
{
<input type="file" name="image" />
<input type="submit" value="Upload" />
}

</p>
<ul>

@foreach (var item in Model)
{
<li>
<img src="@item" alt="Images uploaded"width="150"height="150" />
</li>
}
</ul>
Lets just overview about the WebRole, WorkerRole and Queue in Azure:-
Web Role in Windows Azure are special purpose services and provide a dedicated IIS used for hosting web application, we can easily add and deploy application to webrole and scale as per our compatibility as per requirement.It is basically front-end that appears to the users.
Worker Role are processes that can do some work as the name suggests. For example, compressing an uploaded image automatically or on the fly, any changes in the database, best is notifications that are recieved.
Queue contain set of messages and those messages should be queue. The main thing is that Web Role, Worker Role and Queues are Virtual Machines running on cloud.
]]>A Favicon (“favorites icon”), is an icon associated with a particular website or webpage that is displayed in the browser address bar next to a site’s URL. Favicon is a little icon, but plays a subtle and important role. It acts as a brand.
What Is It Exactly?
 The WordPress Favicon
This Favicon is very familiar, which can be seen next to the Title of any WordPress WebPage and some other places as described below.
Where this Favicon is Displayed?
It is displayed at three places.
- The URL in the address bar
- The websites name in the list of bookmarks
- In the browsers that support a new feature Tabbed Browsing (Tabbed browsing is a function of some Web Browsers that allow uses to surf and view multiple pages by loading the Websites into “tabbed” sections of one page, rather than multiple pages. This allows the user to view a selection of favorite sites in one window, view multiple search results at the same time, and would allow you to set several pages as your home page, rather than just one)
Using the Code
It is very simple and easy. Follow the steps described below.
Step 1: Go to some online Favicon Generator Website
I recommend Favicon Generator.
Step 2: Browse/Create Favicon for your Website
That would become your Website’s brand image.
Step 3: Generate the Favicon and Download
Add it in your root directory and remember to rename it as sometimes it does not refresh itself if Internet Template is used.
Step 4: Add the Following Code inside head Section of Web Page
<span class="code-keyword" style="color: blue;"><</span><span class="code-leadattribute" style="color: maroon;">link</span> <span class="code-attribute" style="color: red;">rel</span><span class="code-keyword" style="color: blue;">="</span><span class="code-keyword" style="color: blue;">shortcut icon"</span> <span class="code-attribute" style="color: red;">href</span><span class="code-keyword" style="color: blue;">="</span><span class="code-keyword" style="color: blue;">https://www.codeproject.com/NAME of your FAVICON.ico"</span> <span class="code-attribute" style="color: red;">type</span><span class="code-keyword" style="color: blue;">="</span><span class="code-keyword" style="color: blue;">image/x-icon"</span><span class="code-keyword" style="color: blue;">></span>
Put the above code in the <head>.......</head> section of your webpages if Empty Template is used, else in theLayout Page for Internet template.
Points of Interest
While working on a demo, I saw a Favicon in my root directory and got curious to know what is the use. I saw this when I used an Internet Template in ASP.NET MVC4 not an Empty Template. Hope beginners like me get to know about this and use this with their Websites.
Give your Website a brand with these steps and enjoy. 
This is trivial and my very first Tip and Post too, wanted to start with this.
Happy Coding
]]>