Why This?
Just out of curiosity, thought of why Build, Rebuild & Clean Solution in Visual Studio IDE. Earlier, thought use any one of them, i.e. Build & Rebuild, they do the same! but still thought of going through few resources and get the differences and I was staggered to find that I was wrong. 😀
This is a very simple and basic fact, which every developer using VS should be aware of. I wanted to be aware of this before some one questions me the same. I will be discussing their work and describing each as an Agent.
Discuss Facts!
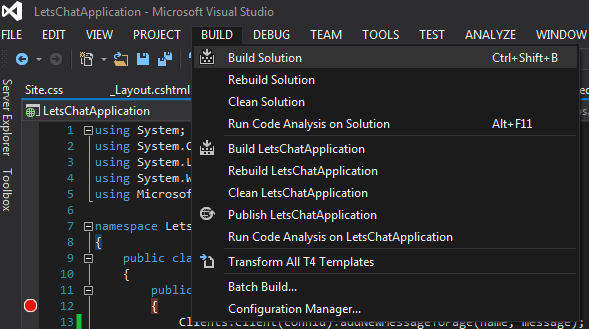
Lets first discuss about Build Solution
Build Solution
:-
‘Ctrl + Shift + B’
The short cut above to build a solution. Now what this Build agent does in the background!
The Build Agent

This agent of the VS IDE does an incremental build. If you build your solution once, with some files changed, then it will build only those files which you have changed, without touching the files that are not even touched by you. 😛
Moreover, if you are building the Solution once and then again doing a build, it will not again build the solution actually, as the agent finds no files that are changed!
We see the build result on the output window in the IDE.
Lets see a pictorial difference.

As you see in the above image, the dll of the project gets re-generated, as a file was modified under that project. Since, my solution has a single project, so it creates the dll of that only.

In the above image as we hit the Build, the Build is succeeded but shows ‘0 succeeded’ i.e. there were no files modified, for which it did not create any dll.

Re-Build Solution

This agent is the master of all. This is the combination of Clean & Build.
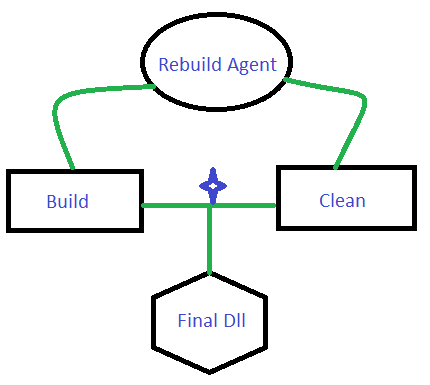
This does not check or bother if there are any changed/modified files, it will always do a clean and build the solution or the specific project. This will recompile and regenerate the dlls inside the bin folder.
Clean Solution

The clean Madam, cleans and removes all the dlls created inside the bin folder. The procedure she follows is simple, just remove the Dlls related to the project or related to the entire solution from the bin folder.
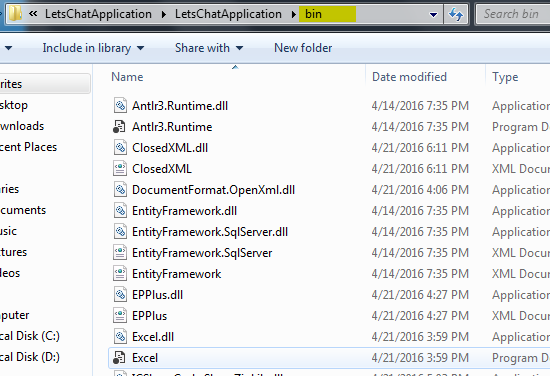
Before Clean the bin folder has all the dlls:
After the clean when the clean succeeds, all the dlls are removed by the clean agent.

When to use what
To be honest, we can use any of them, I prefer a Clean first and then a Build. What do you?
When we
- Rebuild a Solution with 2-3 projects, then the Re-build agent cleans the project 1 and then builds the project 1. Similarly, cleans project 2 and builds project 2 and so on.
- When we clean and then build a solution, then the Clean agent first removes all the dlls for each project and then the build agent generates the project dlls at once.
Thus I have shared a simple tip and know how fact which might be handy and mandate as we are a
Visual Studio developer!