Introduction
In this article , I would be discussing a very interesting topic called WebSecurity in MVC applicationa and how easy and simple it is to implement and understand. Let me share a small incident for which I came across this concept. Usually we create an MVC application and select a template may it be Internet or Empty (these two are used frequently). Based on these templates, the web project gets scaffolded and we get the final project structure to work on. If we select an Internet application, then by default scaffolding we get controller “Home” and “Account” created. ASP.NET MVC bydefault provides the authentication through the Web Security. I tried to customize the way authentication was done and then realized this is so simple and easy, as it reduces so many lines of our codes. Lets discuss more on this with a small Demo.
Lets Play..
Lets briefly get to know what Web Security is!! According to MSDN, it provides security and authentication to Asp.Net web applications with many more features like user account creation, Login User and Log off, Reset & Change Password, with the help of its in-built functions. It internally also does the Password hashing which is one of the main concern during creation of a user account. The different properties and methods are well explained in the MSDN link given above. This is usually called as Helper class that is present in the namespace- “System.WebMatrix.WebData”. When an Internet template is chosen we would find the “Dynamic Link Library” , WebMatrix.WebData.dll
Lets create a new project in Visual studio:
Here I create a new Asp.Net Web Project and name it as “WebSecurityDemo” and after clicking on ok the final creation of project in Visual Studio looks like below:
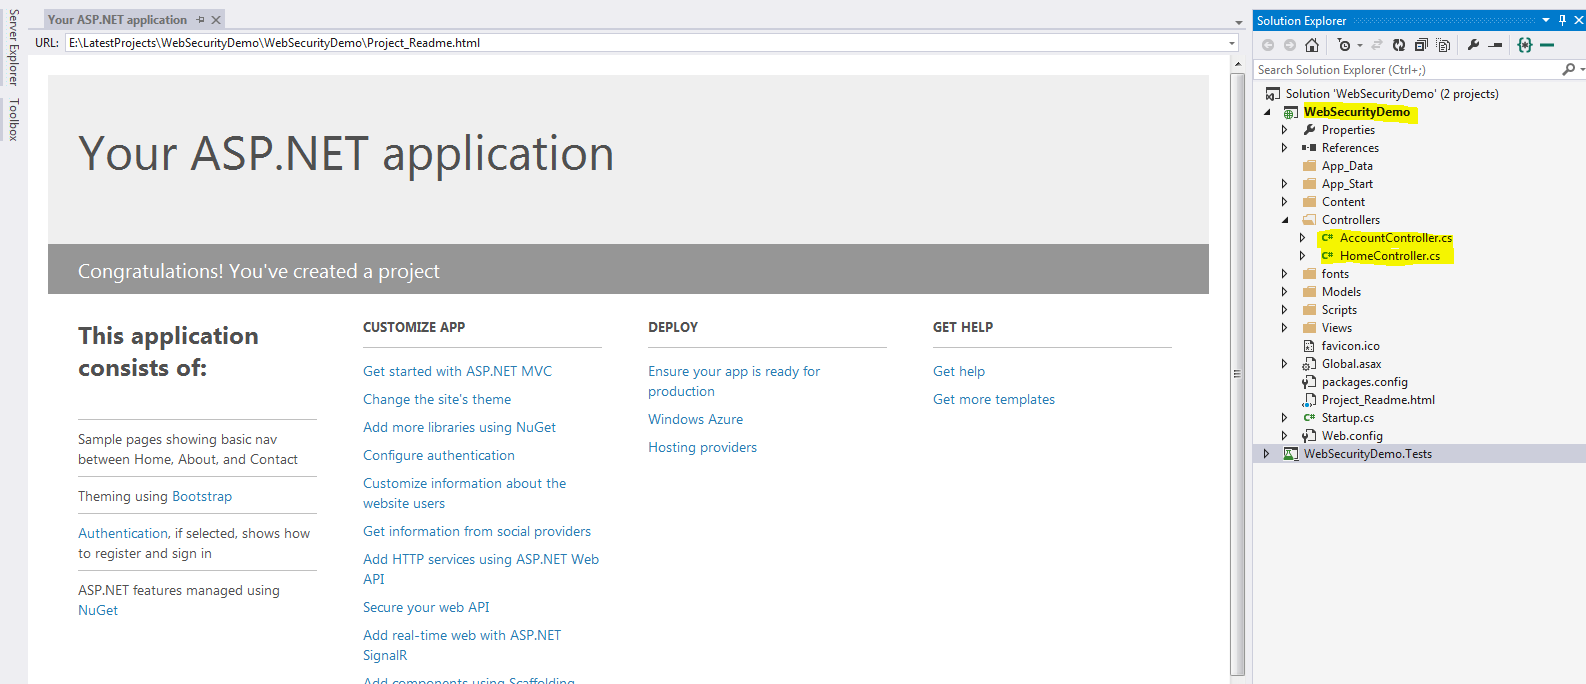
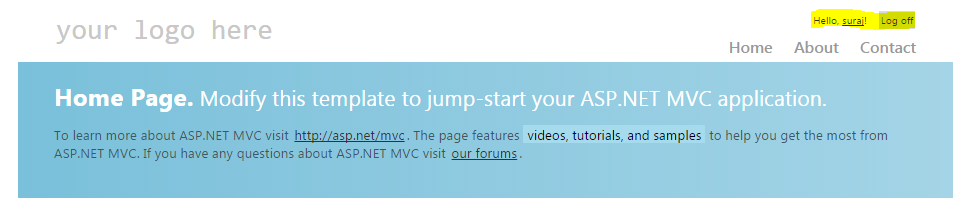
As we can see in the above image, the project is scaffolded based on the Internet template in MVC. This by default creates the Home controller and Account controller with all kinds of authentication and security. This default web application without any coding, gives user options to Register, Login, Log off and OWIN authentication using Facebook, Twitter, G+(this requires some modification which I will be discussing later). But how does this happen!! This is done by the Authorize attribute provided by MVC, which is one of the best assets of MVC. Just specifying an attribute like “[Authorize]” which restrict user access to the methods/actions if specified at controller level or also can be specified at action level, just like the below snippet:
|
1 2 3 4 5 6 7 8 9 10 |
[Authorize] [InitializeSimpleMembership] public class AccountController : Controller { [AllowAnonymous] public ActionResult Login(string returnUrl) { ViewBag.ReturnUrl = returnUrl; return View(); } |
In the above snippet as you can see the Authorize attribute is given at the controller level, which will restrict users to access the action methods defined inside this controller,but as you can also see another attriute called [AllowAnonymous] this is provided on the action method, which means any user can access this action using the url directly. This attriute overrides the controller level attribute here. The best part to this authorize attributeis we can also override this and create our own custom Authorize attribute like below:-
|
1 2 3 4 5 6 7 8 9 10 11 12 13 14 15 16 17 18 19 20 21 22 23 24 25 26 |
namespace WebSecurityDemoTest.Filters { public class WebSecurityAuthorize:AuthorizeAttribute { protected bool AuthorizeCore(HttpContextBase httpContext) { if (!httpContext.Request.IsAuthenticated) { return false; } if (HttpContext.Current.Session["SessionHelper"] == null) { return false; } return true; } protected void HandleUnauthorizedRequest(AuthorizationContext filterContext) { filterContext.Result = new RedirectResult("/"); base.HandleUnauthorizedRequest(filterContext); } } } |
As you might see here, I have created a custom authorize attribute, which first checks if the current http Request is Authenticated or not, Since we will be using FormsAuthentication, this IsAuthenticated gets initialized after Login or inside the LoginPost method like:
|
1 |
FormsAuthentication.SetAuthCookie(userName,true); |
The boolean value true does the trick. After successful login when the AuthCookie is set, the IsAuthenticated for the request is set to true. Now if that is not true, then it is handled by the other method i.e. HandleUnAuthorizedRequest. When there is an unauthorize request it checks and return the user back to the default page i.e. the login page. Here, as you can also see I have checked for the session also, after the user has a successful login, I create a session and store the values as is usually done, and based on that also I check if the session is not null, if the AuthorizeCore method returns true, then the user navigates to the desired landing page. Thus, this is how a custom authorize attribute is created.
Now lets discuss more about another class that is created inside the Filters folder, when the project gets created i.e. <em>”InitializeSimpleMembershipAttribute.cs”</em>. This class is responsible to initialize the tables required by the Web Security to run in the database. Lets see how the class looks like and discuss about that:-
|
1 2 3 4 5 6 7 8 9 10 11 12 13 14 15 16 17 18 19 20 21 22 23 24 25 26 27 28 29 30 31 32 33 34 35 36 37 38 39 40 41 42 43 44 45 46 47 48 49 50 |
using System; using System.Data.Entity; using System.Data.Entity.Infrastructure; using System.Threading; using System.Web.Mvc; using WebMatrix.WebData; using WebSecurityDemoTest.Models; namespace WebSecurityDemoTest.Filters { [AttributeUsage(AttributeTargets.Class | AttributeTargets.Method, AllowMultiple = false, Inherited = true)] public sealed class InitializeSimpleMembershipAttribute : ActionFilterAttribute { private static SimpleMembershipInitializer _initializer; private static object _initializerLock = new object(); private static bool _isInitialized; public override void OnActionExecuting(ActionExecutingContext filterContext) { // Ensure ASP.NET Simple Membership is initialized only once per app start LazyInitializer.EnsureInitialized(ref _initializer, ref _isInitialized, ref _initializerLock); } private class SimpleMembershipInitializer { public SimpleMembershipInitializer() { Database.SetInitializer<UsersContext>(null); try { using (var context = new UsersContext()) { if (!context.Database.Exists()) { // Create the SimpleMembership database without Entity Framework migration schema ((IObjectContextAdapter)context).ObjectContext.CreateDatabase(); } } WebSecurity.InitializeDatabaseConnection("DefaultConnection", "UserProfile", "UserId", "UserName", autoCreateTables: true); } catch (Exception ex) { throw new InvalidOperationException("The ASP.NET Simple Membership database could not be initialized. For more information, please see https://go.microsoft.com/fwlink/?LinkId=256588", ex); } } } } } |
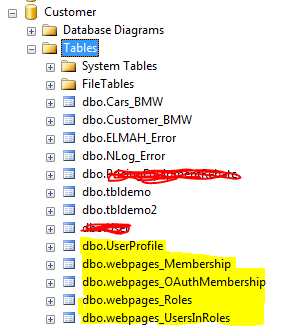
As you can see, since this class extends itself from the ActionFilterAttribute, then it is used as an attribute only, usually at the controller level as you can check in the first code snippet. [InitializeSimpleMembershipAttribute]. This attribute, what it does in simple language is ensures before any action runs, that the membership has been created at the database level or not. So that when a userregisters it stores the data in the system defined tables. System Defined Tables!!![]() . Yes the tables required for the Websecurity are created once we build and run the application and the controller action gets called which has the attribute defined. But how? The below peice of code snippet does the trick:-
. Yes the tables required for the Websecurity are created once we build and run the application and the controller action gets called which has the attribute defined. But how? The below peice of code snippet does the trick:-
|
1 |
WebSecurity.InitializeDatabaseConnection("DefaultConnection", "UserProfile", "UserId", "UserName", autoCreateTables: true); |
As you can see the method “InitializeDatabaseConnection” present in the WebSecurity class, explains itself what it does. This initializes the database connection based on the first parameter which is the database name here. Then the sql table with the name gets created, with columns UserId as the primary key and the UserName associated with the user who registers. Now we need to add a Database context to our project:
- Right click on the Model folder. Select Add new Item:
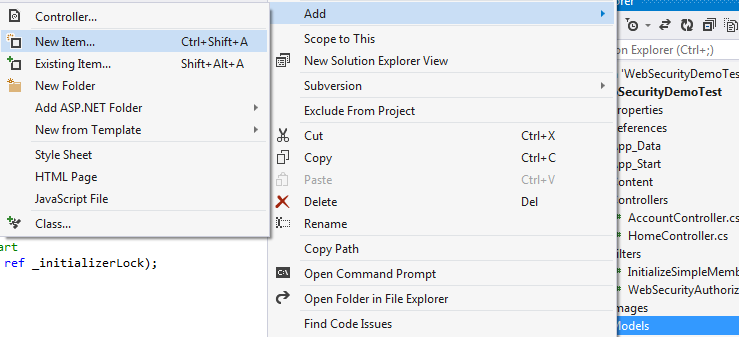
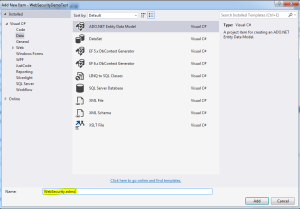
- Then select Data and Add an Ado.Net Entity Data Model with a valid name.
 I have named the data model as WebSecurity.edmx. This creates the conceptual model for the database after we give the connection.
 - Then we need to specify the connection to the database. You can create a sample database or use an existing one. I will be using one existing one and will show how the tables for websecurity get generated. Select Generate from database

- Then the connection needs to be setup. Choose your local server, so in the database textbox enter “.(dot)” which means local DB and that would list the databases present in your local. Choose anyone you wish to.
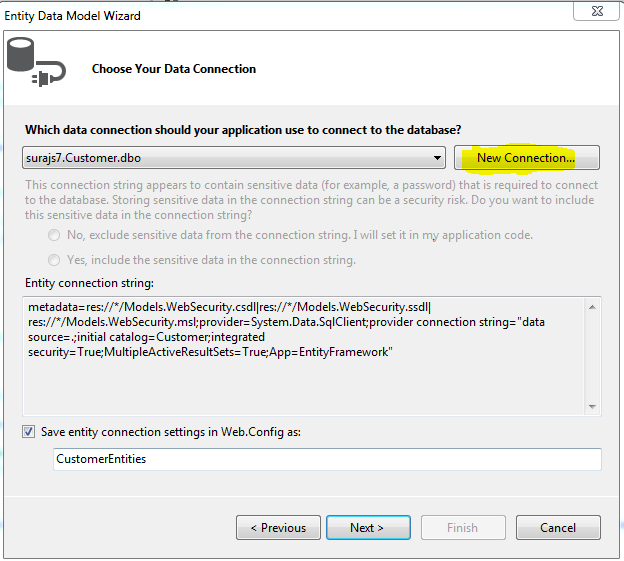
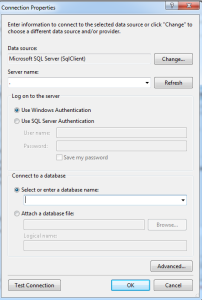
- Thus, when the connection is success and is established, we can find the connection string in theWeb.Config file.

- Then since you can scroll up and see in the InitializeSimpleMembership.cs we have the DefaultConnection specified, we need to change the configuration specified defaultin the web.config connection string, that is change the Data Source = . and remove the AttachedDbFileName entirely and then specify the Initial Catalog as the database name which you have added during the db connection. Finally the connection string with name “DefaultConnection” looks like:
1<add name="DefaultConnection" connectionString="Data Source=.;Initial Catalog=Customer;Integrated Security=SSPI;" providerName="System.Data.SqlClient" />
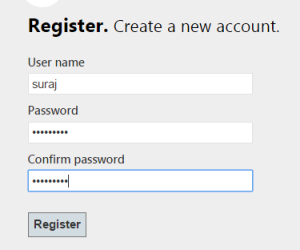
- Thus, we have reached the end to the set up. Now clean and build the solution once and then run. When we run the application, we land on the Home page as the Home controller has no authorization. And also remember one thing the membership/ websecurity tables will only get created once the InitializeSimpleMembership attribute is hit and in the above snippets it gets hit only when the Account controller is accessed. So when we go to any action method that is AllowAnonymous as we also need to land on the page, So we click on the Register.
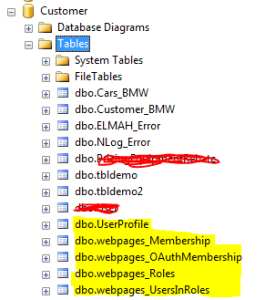
- The below image shows the table created once the attribute is hit/executed. “dbo.webpages_Membership” stores all the information related to the User registered with the User password that is hashed and that to one way for more security. User Id which acts as the foriegn key here to the UserId primary key in the UserProfile table which also contains the UserName which is asked during the registration.
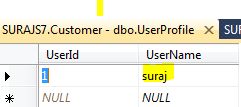
- After the registration, you will find yourself logged in as the UserName entered and the data in the tables would look like:

- Thus this is how the simple attribute, internally does everything.


Now lets check for the codes , the method WebSecurity class implements. First is the “WebSecurity.UserLogin”
|
1 |
WebSecurity.Login(model.UserName, model.Password, persistCookie: model.RememberMe) |
This method, takes the UserName, the password and the persistCookie which is the Remember Me check box. This maps the webpages_Membership table and the UserProfile table for the combination of the userName and password, if this satisfies or is perfectly mapped, it redirects user tothe authenticated page, else throws him back to the Login page. if wrong password is entered then it gives the ModelState error as incorrect username and password. If the Remember Me is checked, then the IsPersistent is true in the cookie which is created, then when next time even after closing the browser we come, the cookie persists based on the span it has and authenticates the user without the credentials.
The next method used is “WebSecurity.ChangePassword”
|
1 |
WebSecurity.ChangePassword(User.Identity.Name, model.OldPassword, model.NewPassword) |
This method takes the unique username, with the old Password and also the new Password as the parameters. It internally matches first the old password with the User name (Logged In) and then if satisfies stores or replaces the old password with the new one encrypting it or hashing it. This is that simple. 🙂
Now the other method and an important one, when the user registered, how did the data get saved into the table!! Nice question .. 🙂 The answer is another inbuilt method that does the trick here i.e. “WebSecurity.CreateUserAndAccount”
|
1 |
WebSecurity.CreateUserAndAccount(model.UserName, model.Password) |
what this does is, takes the parameter as the unique user name and the password, then adds the user name into the UserProfile table that returns the UserId and whichinturn is used as the foreign key with one to one relationship and hashes the password and stores in the webpages_Membership table. This is how a user gets registered so simply using WebSecurity.
There is also a method called Logout, which simply logs out a user. “WebSecurity.Logout()”.
Conclusion
Thus, I discussed in this article the details of WebSecurity class and how to use that in the MVC application. The method and the membership authentication is the same, just we need to customize inorder to have our own hold over it. It is very easy ans simple to use, which makes the code less redundant and reusable and mainly maintainable. This follows usually the DRY concept which is Don’t Repeat Yourself. Thus this suggests to use evrything once, like have an Authorize attribute may it be Custom and reuse it wherever required. WebSecurity has everything defined, we just need to explore and use its methods and properties extensively to reduce the level of coding and LOC.
Thus here I end my article I hope I could explain atleast something.
Though I am not an expert and moreover a human, so mistakes are ovious. i would be glad if you find any or also suggestions and discussion are most welcome.
Share and learn.
CP